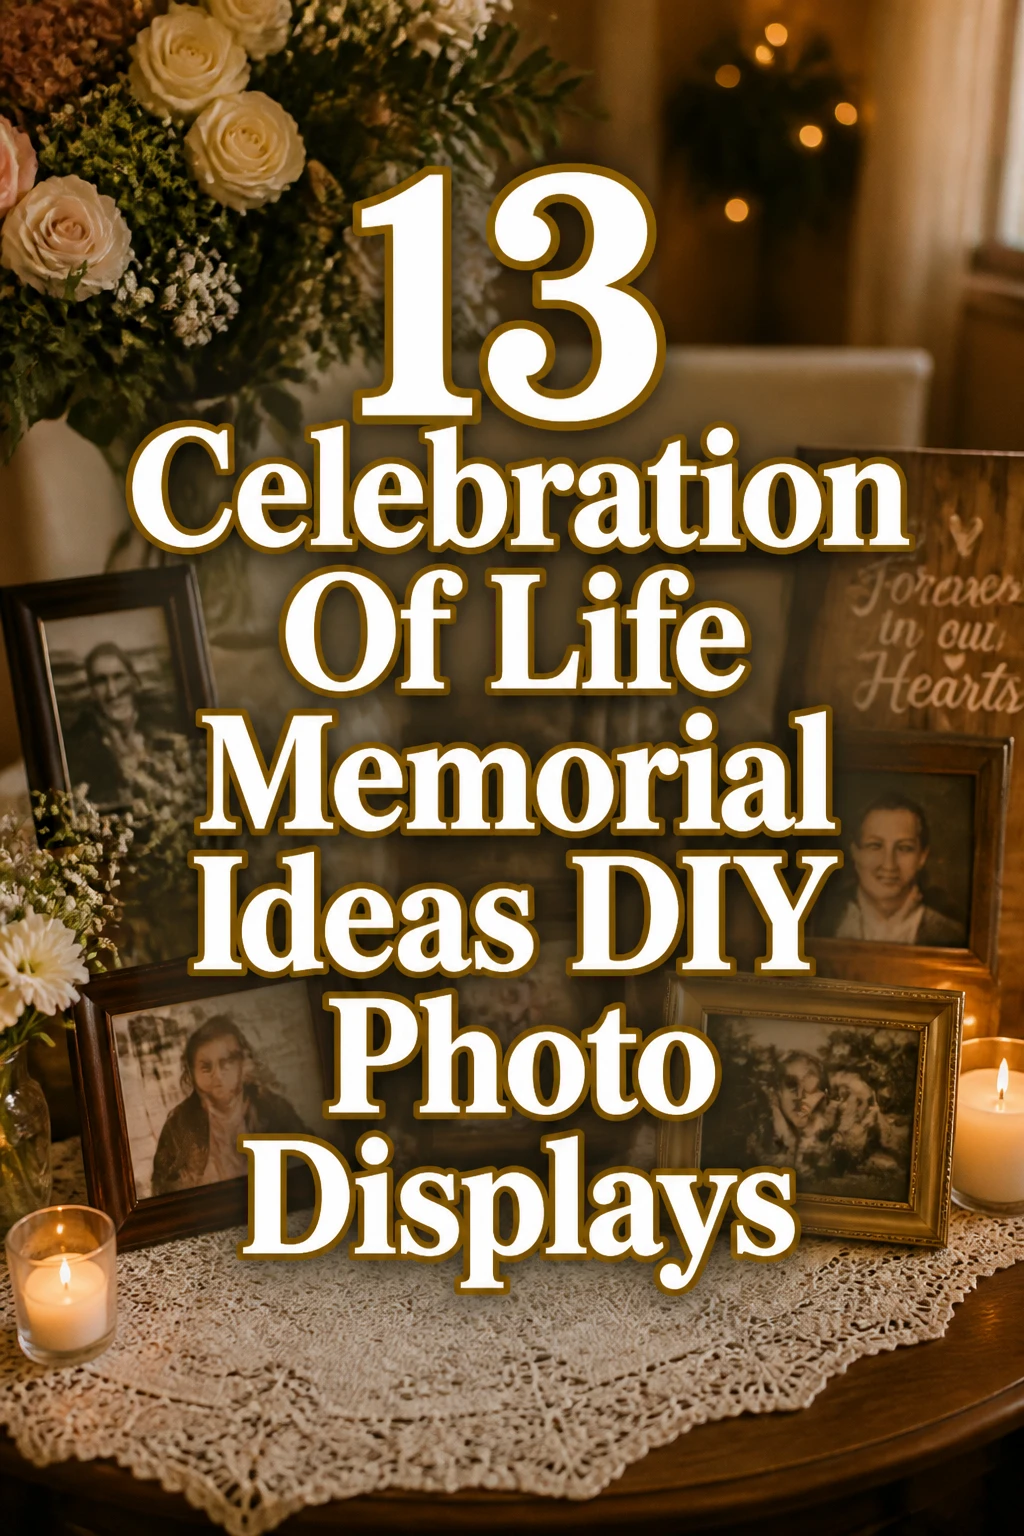
13 Celebration Of Life Memorial Ideas DIY Photo Displays
Okay, so someone you love deserves an epic send-off, right? But planning a celebration of life can feel like a whole thing, especially when you want it personal and not, you know, totally grim.
You want to honor their memory without breaking the bank or hiring a full-on event planner.
Good news, buttercup. We’ve got 13 seriously cool, DIY photo display ideas that’ll help you tell their story with style and a whole lot of heart.
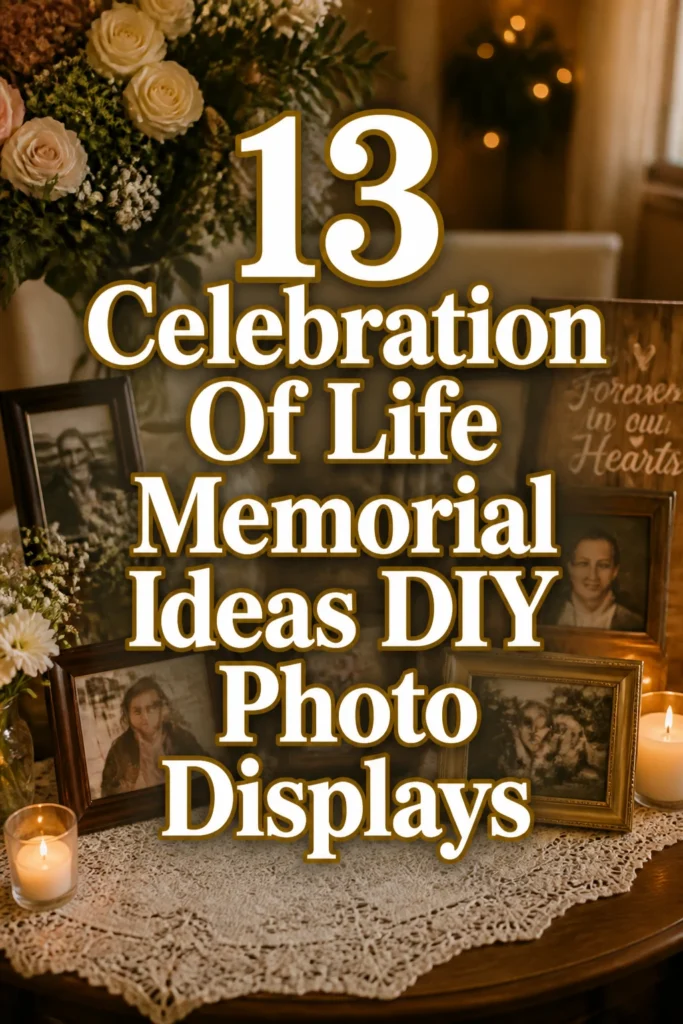
1. The Memory Clothesline
- Best For: Casual, outdoor gatherings or rustic indoor spaces.
- Vibe: Whimsical, personal, and effortlessly charming.
- Why it works: Guests can easily browse photos at their leisure.
Grab some sturdy twine or cute ribbon and a pack of mini clothespins. String it up between two trees, across a mantle, or along a blank wall.
Print photos in various sizes – think 4x6s mixed with some larger 5x7s – and clip them up. You can even add small handwritten notes on cardstock for extra flair, maybe a funny anecdote next to a silly photo.
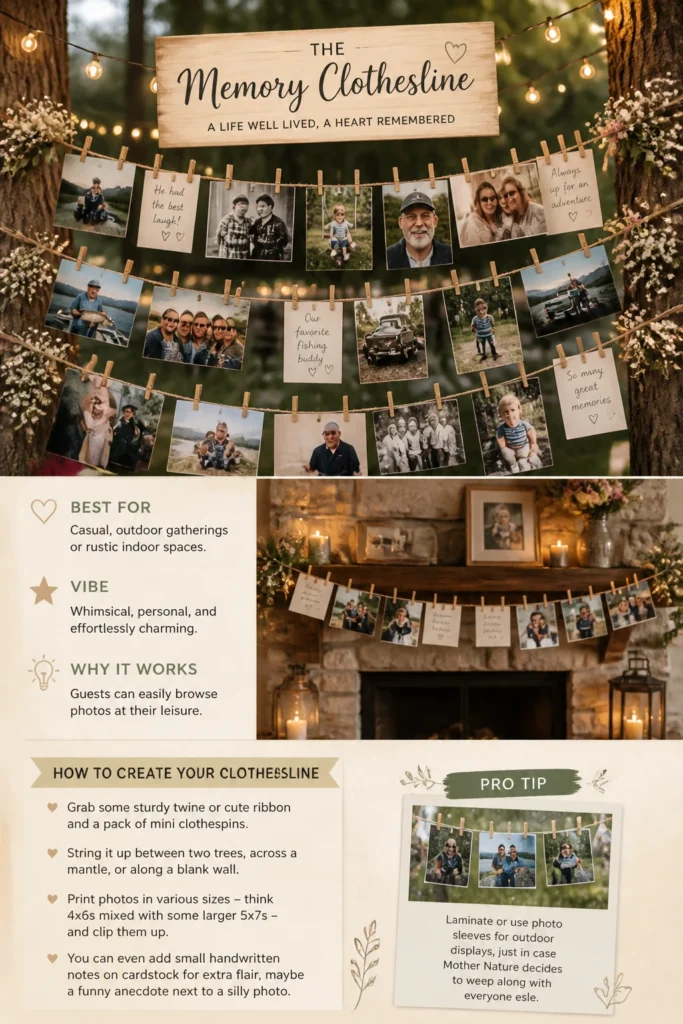
Pro Tip: Laminate or use photo sleeves for outdoor displays, just in case Mother Nature decides to weep along with everyone else.
2. The Photo Jar Vignette
- Best For: Intimate indoor settings, mantelpieces, or as table centerpieces.
- Vibe: Nostalgic, cozy, and thoughtfully curated.
- Why it works: Creates small, touching moments for guests to discover.
Gather an assortment of clear glass jars – mason jars, old pickle jars, or even vintage apothecary bottles work wonders. Print photos on slightly thinner paper so they can curl.
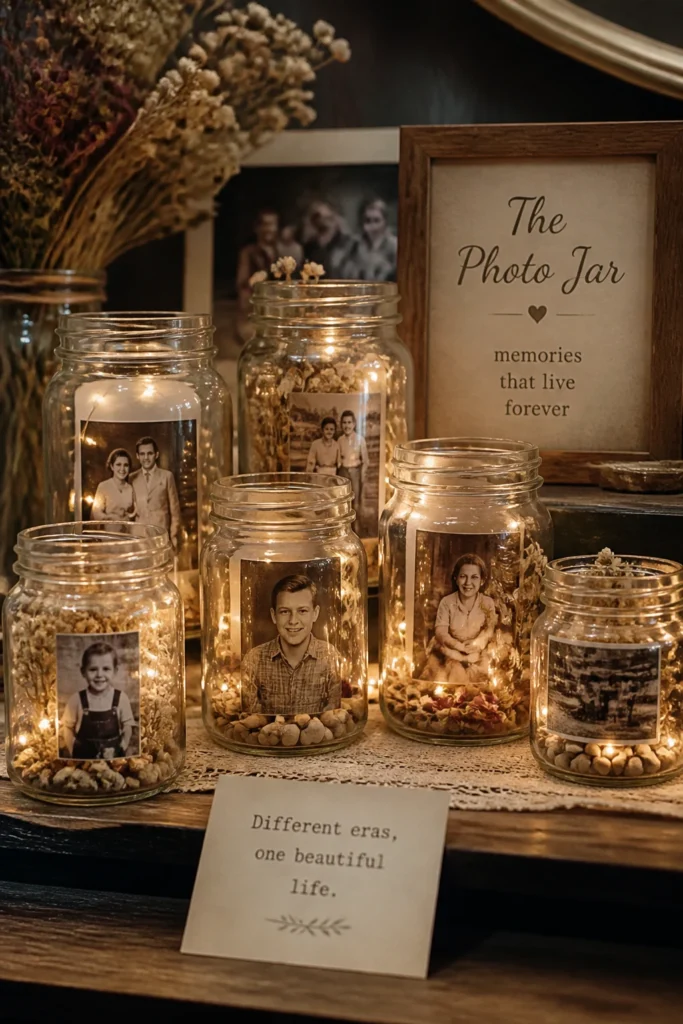
Gently roll or fold photos to fit inside, facing outwards. You can add a small battery-operated fairy light strand for a warm glow, or even some dried flowers or pebbles at the bottom for texture. This setup costs next to nothing.
Pro Tip: Use photos of different eras in each jar to tell a mini-story as guests walk around.
3. The Photo Memory Tree
- Best For: Larger gatherings, a focal point in a room, or an interactive element.
- Vibe: Organic, collaborative, and deeply personal.
- Why it works: It’s a beautiful, living tribute that grows throughout the event.
Find a sizable, bare branch – think something sturdy from a fallen tree, or a decorative artificial one. Secure it upright in a heavy pot filled with sand or decorative stones.
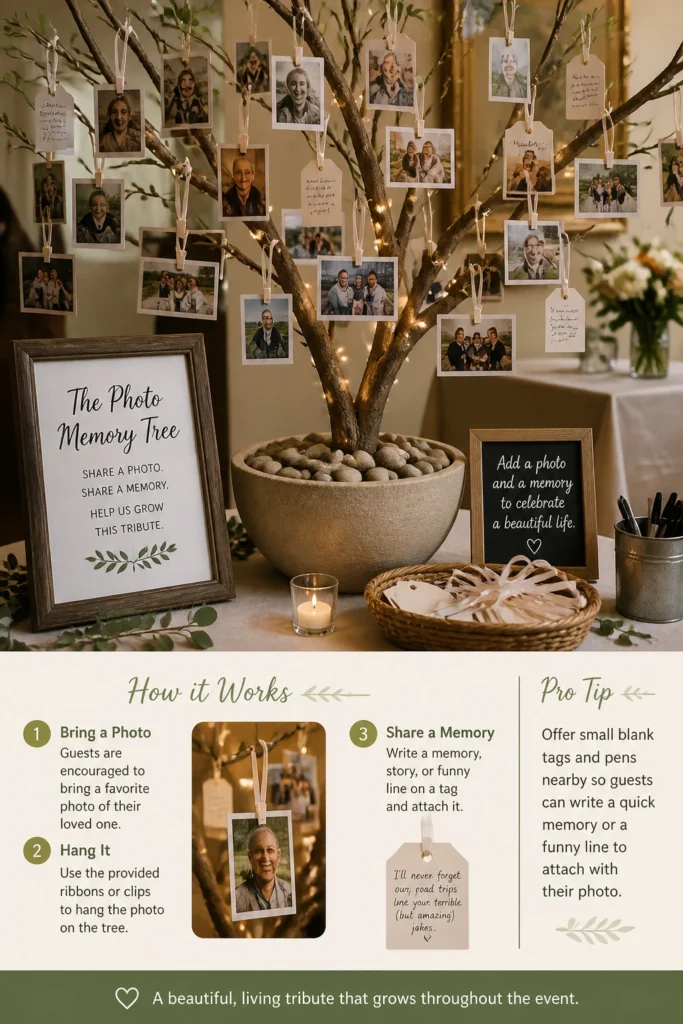
Print photos with a small hole punched at the top or use tiny clips. Guests can hang photos of the departed, perhaps even ones they brought themselves, creating a truly unique display. Provide some extra ribbon loops or hooks for convenience.
Pro Tip: Offer small blank tags and pens nearby so guests can write a quick memory or a funny line to attach with their photo.
4. The Framed Gallery Wall Collage
- Best For: Formal settings, entranceways, or a dedicated memorial corner.
- Vibe: Elegant, artistic, and a comprehensive visual biography.
- Why it works: Elevates photos into a sophisticated art display.
Collect an array of picture frames in various sizes and styles – mixing gold ornate frames with simple black modern ones adds character. Don’t be afraid to paint some frames to match a specific color palette, like soft blues or muted greens.
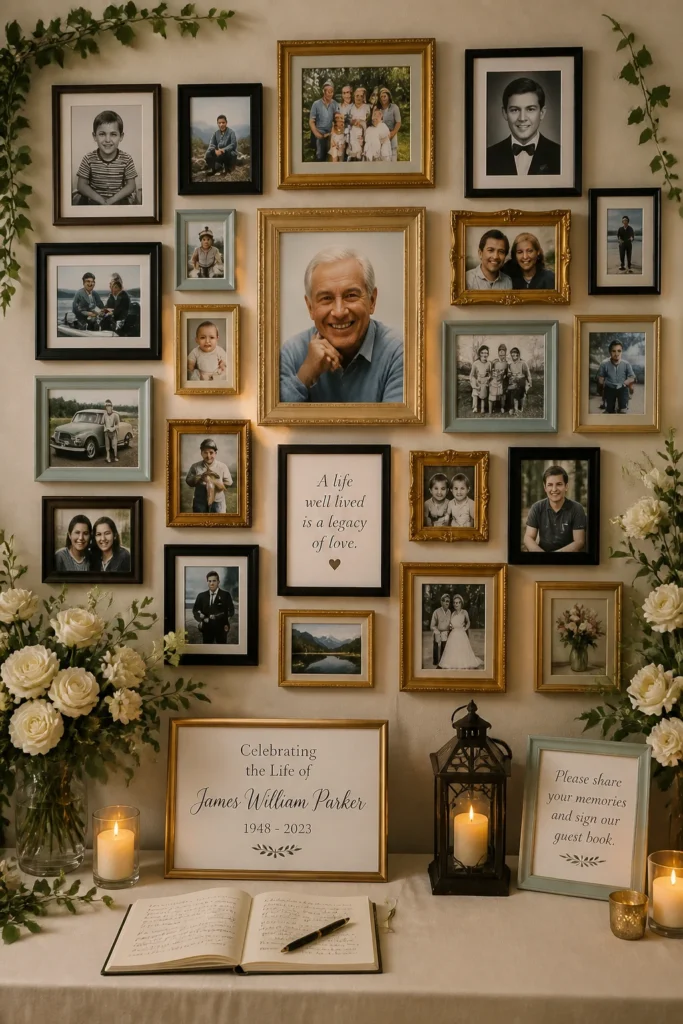
Arrange the frames on a wall or a large display board before the event to get the spacing just right. Fill them with cherished photos, from baby pictures to recent snaps, creating a compelling visual narrative. This looks impressive without a huge price tag if you thrift frames.
Pro Tip: Include a framed quote or a short poem about their life amidst the photos for an extra touch of reflection.
5. The Digital Photo Loop
- Best For: Tech-savvy families, modern venues, or when space is limited.
- Vibe: Dynamic, contemporary, and endlessly engaging.
- Why it works: Displays a vast number of photos without taking up physical space.
Load hundreds of photos onto a digital photo frame, a laptop connected to a monitor, or even project them onto a blank wall. Set the slideshow to loop continuously.
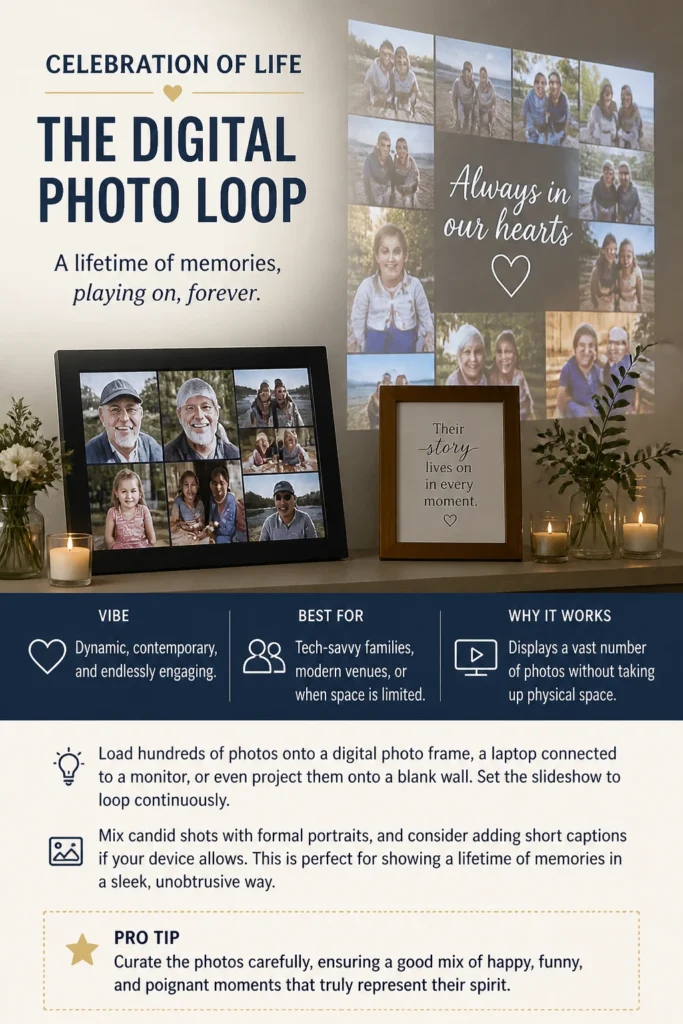
Mix candid shots with formal portraits, and consider adding short captions if your device allows. This is perfect for showing a lifetime of memories in a sleek, unobtrusive way. It’s also super cost-effective if you already own the tech.
Pro Tip: Curate the photos carefully, ensuring a good mix of happy, funny, and poignant moments that truly represent their spirit.
6. The Photo Cube Centerpieces
- Best For: Table decor, small intimate gatherings, or scattered around a room.
- Vibe: Playful, personal, and interactive.
- Why it works: Guests can easily pick up and rotate to see different photos.
Purchase clear, acrylic photo cubes or even DIY some using cardboard boxes and clear adhesive sheets. Print photos to fit each side of the cube.
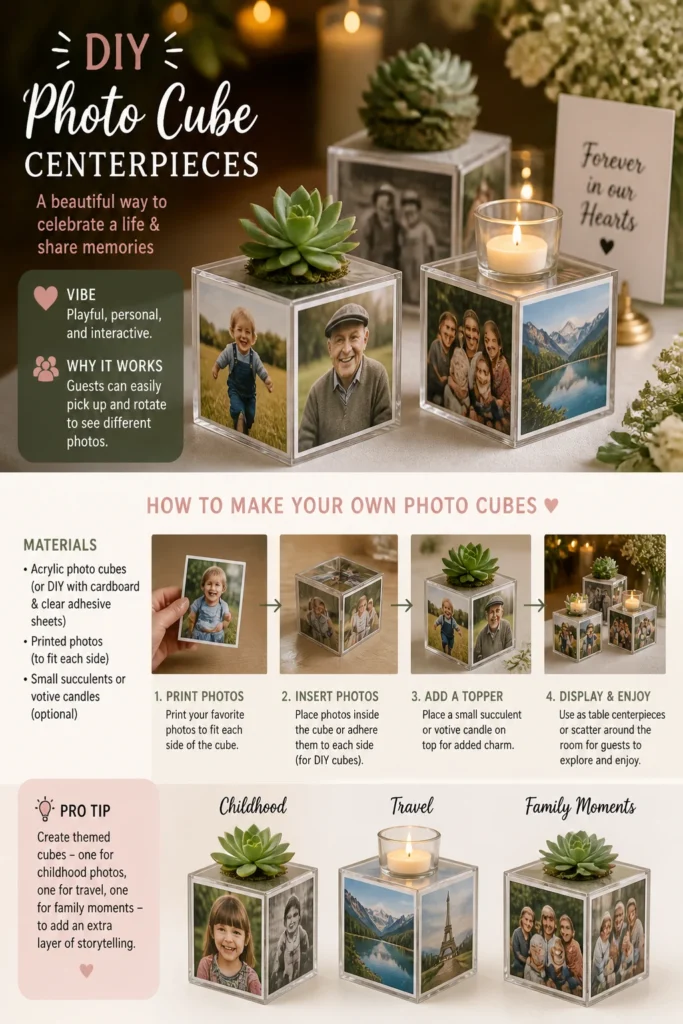
These make fantastic table centerpieces, allowing guests to view multiple photos from different angles. You can even include a small succulent or a votive candle on top of each cube for added charm, keeping the cost per table low.
Pro Tip: Create themed cubes – one for childhood photos, one for travel, one for family moments – to add an extra layer of storytelling.
7. The Memory Lanterns
- Best For: Evening events, outdoor patios, or creating a serene atmosphere.
- Vibe: Serene, reflective, and warmly inviting.
- Why it works: Combines ambient lighting with personal memories.
Grab some decorative lanterns – white metal ones or rustic wooden styles look great. Print photos on vellum paper or regular photo paper cut to fit the lantern panels.
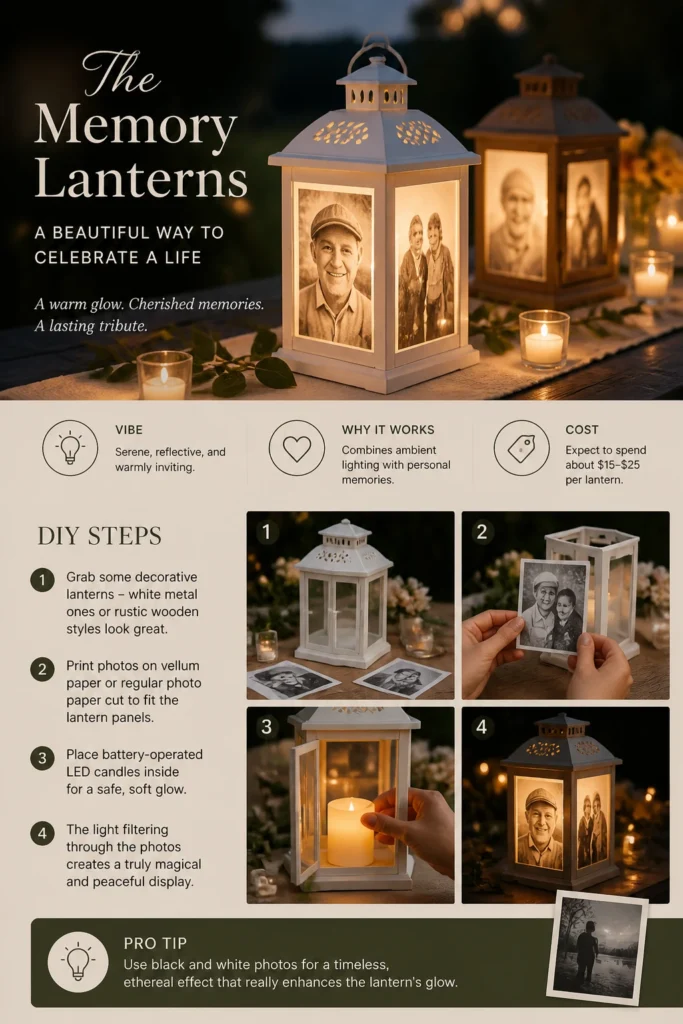
Place battery-operated LED candles inside for a safe, soft glow. The light filtering through the photos creates a truly magical and peaceful display. Expect to spend about $15-25 per lantern, depending on size and style.
Pro Tip: Use black and white photos for a timeless, ethereal effect that really enhances the lantern’s glow.
8. The Photo Scroll Banner
- Best For: Large wall spaces, entranceways, or behind a memorial table.
- Vibe: Grand, impactful, and a journey through time.
- Why it works: Provides a continuous visual timeline of their life.
Print a series of photos and adhere them sequentially onto a long roll of kraft paper or fabric, like linen. You can create a timeline effect, showing their life from beginning to end.
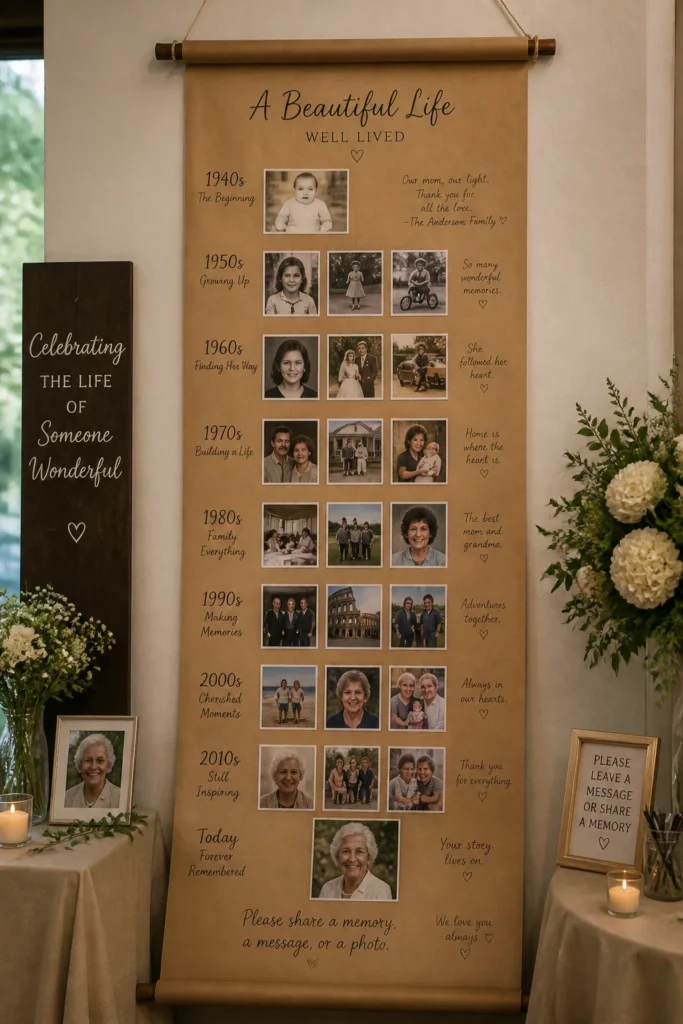
Attach wooden dowels to the top and bottom for easy hanging and a finished look. This display is a showstopper and can be surprisingly affordable if you print photos yourself and use basic craft supplies.
Pro Tip: Leave some blank space for guests to write messages directly onto the scroll or add their own small photos.
9. The Photo Wreath
- Best For: Doorways, above a mantel, or as a focal point on a wall.
- Vibe: Welcoming, symbolic, and heartfelt.
- Why it works: A beautiful, circular representation of life’s continuous journey.
Start with a simple wreath base – grapevine, foam, or even a wire hanger bent into a circle. Print small, perhaps 2×3 or 3×3 inch photos.
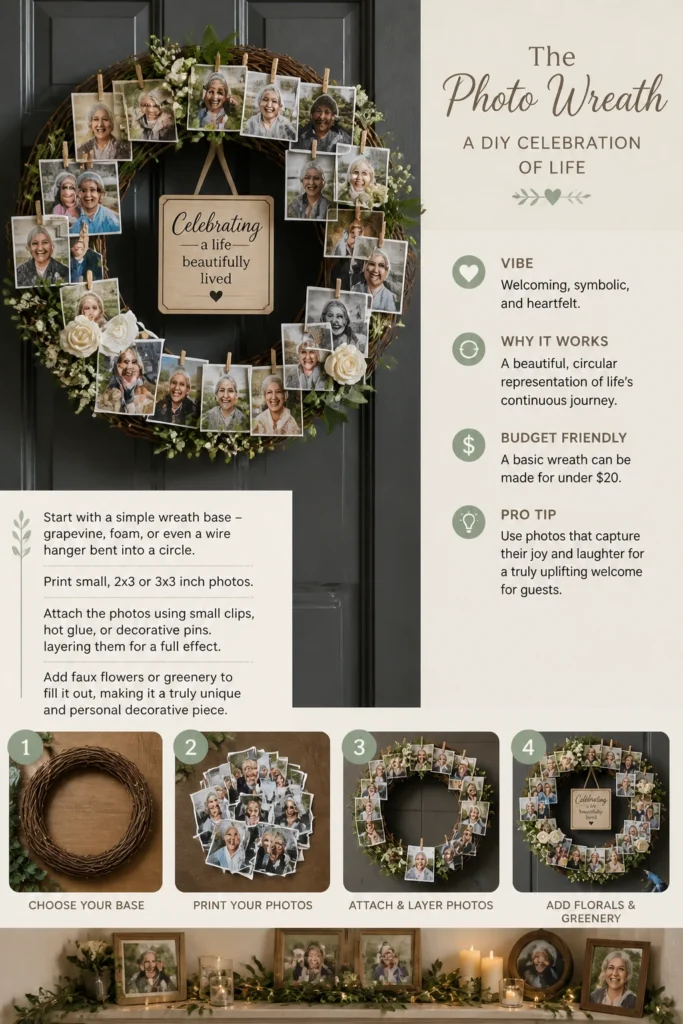
Attach the photos using small clips, hot glue, or decorative pins, layering them for a full effect. You can add some faux flowers or greenery to fill it out, making it a truly unique and personal decorative piece. A basic wreath can be made for under $20.
Pro Tip: Use photos that capture their joy and laughter for a truly uplifting welcome for guests.
10. The Memory Box Display
- Best For: Smaller tables, intimate nooks, or as a collection of personal items.
- Vibe: Intimate, tactile, and deeply personal.
- Why it works: Combines photos with cherished objects, telling a richer story.
Find several small, decorative boxes – wooden, cardboard, or even vintage hatboxes work. Arrange photos inside and around the boxes, perhaps leaning them against the lid.
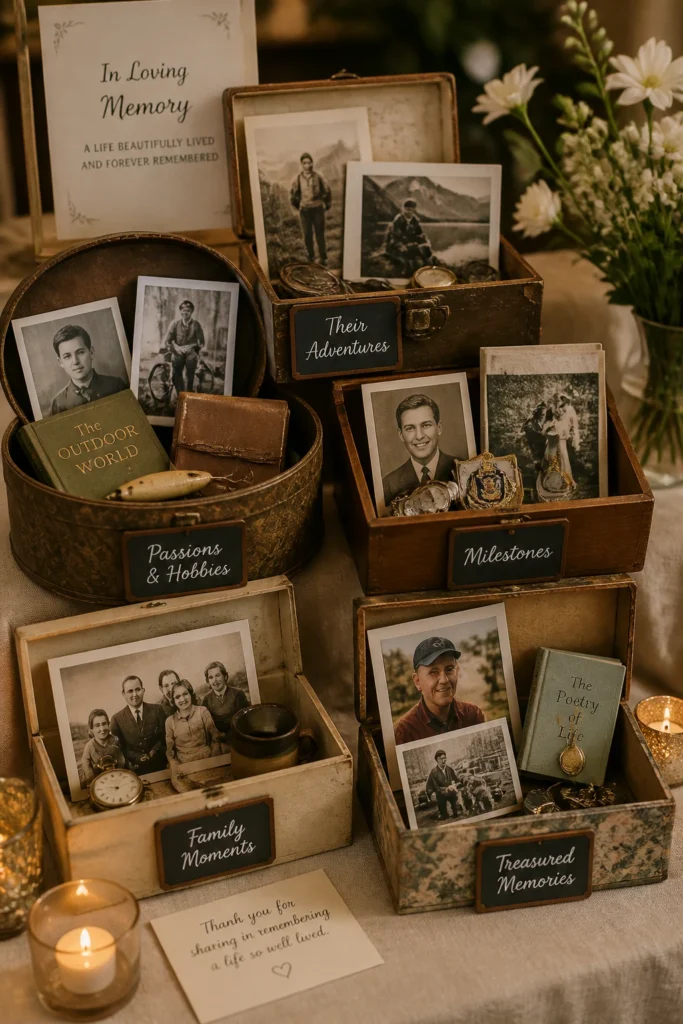
Place small personal items belonging to the departed alongside the photos – a favorite book, a collection of coins, or a piece of jewelry. This creates a deeply touching, mini-museum effect that invites closer inspection.
Pro Tip: Label each box with a theme, like “Their Adventures” or “Family Moments,” to guide guests through the memories.
11. The Photo Balloon Bouquet
- Best For: Outdoor releases, playful tributes, or as a cheerful focal point.
- Vibe: Uplifting, whimsical, and a touch bittersweet.
- Why it works: Visually striking and a unique way to display photos.
Attach small, lightweight photos (maybe printed on regular paper) to the strings of a bouquet of helium balloons. Use a mix of colors that were meaningful to them, or just bright, cheerful ones.
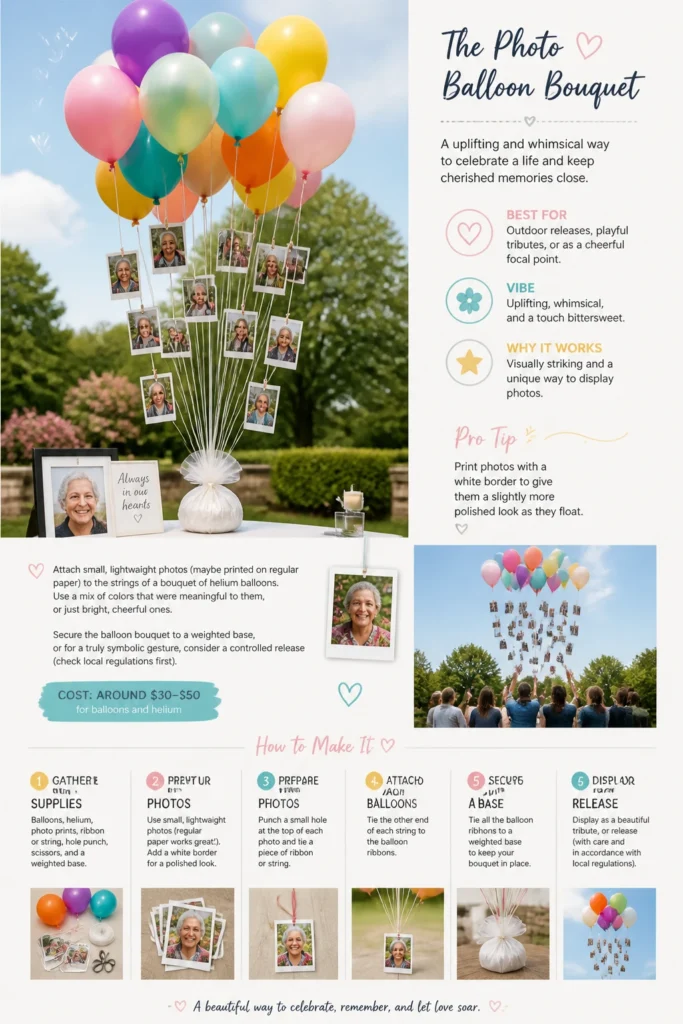
Secure the balloon bouquet to a weighted base, or for a truly symbolic gesture, consider a controlled release (check local regulations first). This idea is memorable and surprisingly simple to put together, costing around $30-50 for balloons and helium.
Pro Tip: Print photos with a white border to give them a slightly more polished look as they float.
12. The Photo Coaster Collection
- Best For: Functional table decor, intimate settings, or as a take-home favor.
- Vibe: Practical, thoughtful, and a subtle reminder.
- Why it works: Guests interact directly with the photos in a unique way.
Purchase plain ceramic or wooden coasters, or even DIY them from tiles. Print photos to fit, then adhere them to the coasters using Mod Podge or a clear sealant.
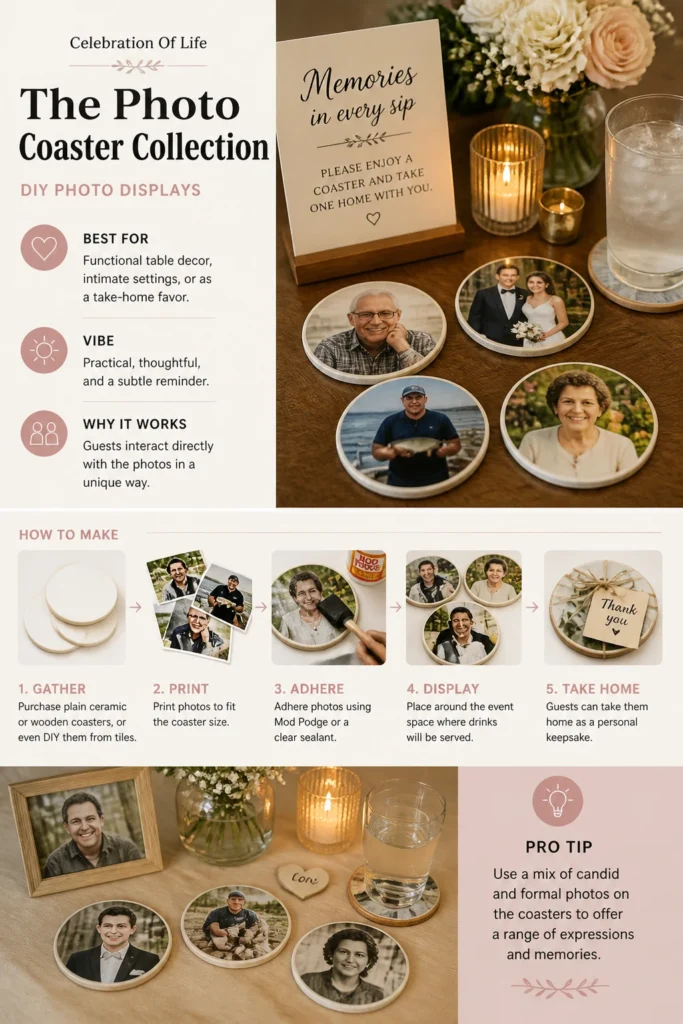
Place these around the event space where drinks will be served. Guests will naturally pick them up, sparking conversation and memories. They can also double as a lovely, personal keepsake for guests to take home.
Pro Tip: Use a mix of candid and formal photos on the coasters to offer a range of expressions and memories.
13. The Life Story Timeline Wall
- Best For: Large, blank walls or hallways, creating an immersive experience.
- Vibe: Educational, chronological, and a profound journey.
- Why it works: Guests can literally walk through their life story, year by year.
Design a timeline on a long roll of butcher paper or directly onto a wall using temporary adhesive. Mark key years or life stages.
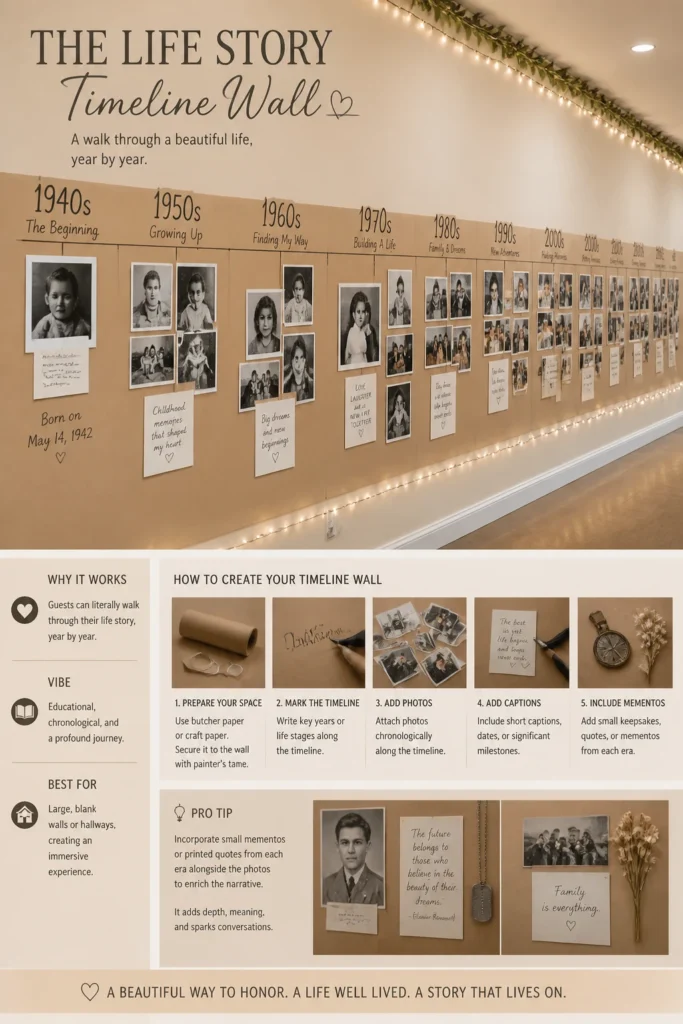
Attach photos chronologically along the timeline, adding short captions or significant dates. This creates an incredibly powerful and engaging display, allowing everyone to witness their life’s journey. This can be done affordably with basic craft supplies.
Pro Tip: Incorporate small mementos or printed quotes from each era alongside the photos to enrich the narrative.
Our Top Recommended Finds
- Mini Clothespins & Twine Set: Essential for the clothesline display and super versatile for attaching photos to anything.
- Assorted Glass Jars & Vases: Perfect for creating those charming vignettes or adding a touch of elegance to any table.
- Battery-Operated Fairy Lights: Adds a magical glow to jars, lanterns, or even draped around a photo tree, no outlet needed.
Which of these will you try first?
See? Honoring someone’s memory doesn’t have to be a somber, stuffy affair. With a little creativity and some elbow grease, you can create a truly beautiful and personal tribute.
These DIY photo displays are all about celebrating the joy and unique spirit of the person you’re remembering. So, which one are you eyeing up for your next heartfelt gathering?