11 Cute Air Dry Clay Ideas Easy
Stuck scrolling endlessly, wishing for a fun, low-effort craft that actually looks good? We totally get it.
Forget those intimidating pottery wheels and expensive kilns. Air dry clay is your new best friend, and we’re about to drop some seriously cute and easy ideas on you.

1. Cute Mini Planters
- Best For: Plant parents with tiny succulents or air plants.
- Vibe: Earthy chic meets adorable.
- Why it works: They’re small, forgiving, and instantly upgrade any desk.
Grab a small ball of clay and pinch it into a cup shape. Think organic, slightly wobbly forms – perfection is overrated here. Paint them in soft pastels like blush pink or sage green, or go bold with tiny polka dots. Just don’t forget to seal them after they’re dry.
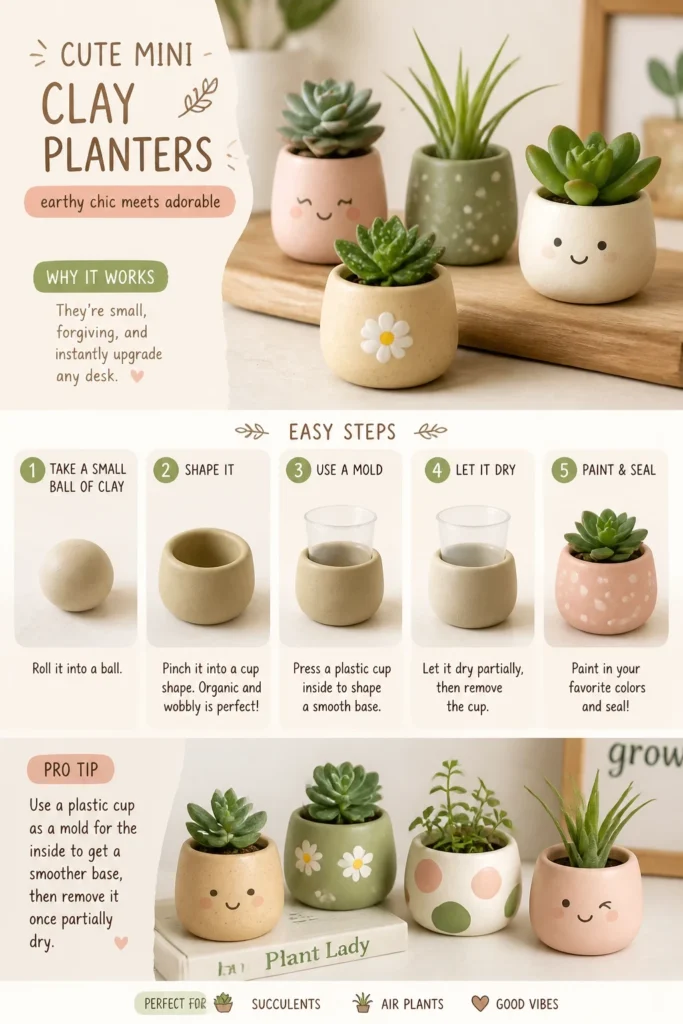
Pro Tip: Use a plastic cup as a mold for the inside to get a smoother base, then remove it once partially dry.
2. Boho Coasters
- Best For: Protecting surfaces from your iced coffee habit.
- Vibe: Laid-back, artisanal, effortlessly cool.
- Why it works: Super practical and an easy way to add a personal touch.
Roll out some clay to about 1/4 inch thick. Use a cookie cutter for perfect circles or squares, or go freehand for a unique organic shape. Stamp patterns onto them with textured items like lace or a leaf before drying. Seal with a clear varnish for water resistance.
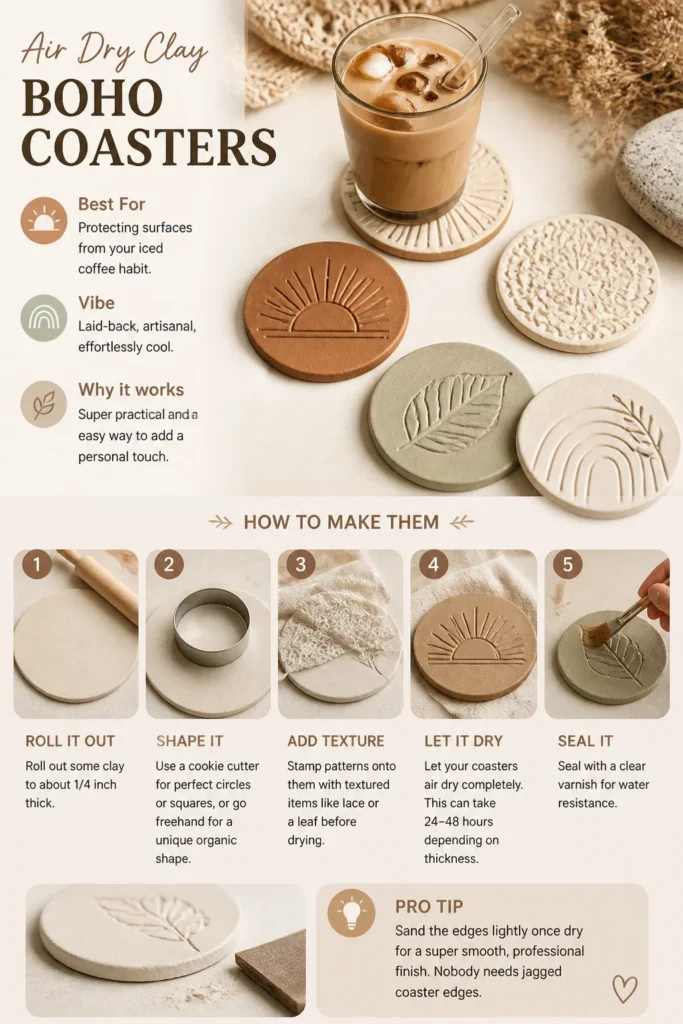
Pro Tip: Sand the edges lightly once dry for a super smooth, professional finish. Nobody needs jagged coaster edges.
3. Trinket Dish Dreams
- Best For: Keeping your rings and tiny treasures organized.
- Vibe: Minimalist glam with a handmade twist.
- Why it works: They’re functional, look beautiful, and require zero complex techniques.
Flatten a small piece of clay into a circle or an irregular blob. Gently pinch up the edges to form a shallow bowl. Experiment with marbling by twisting two different clay colors together before flattening. Paint the edges with gold acrylic for an extra touch of luxe.
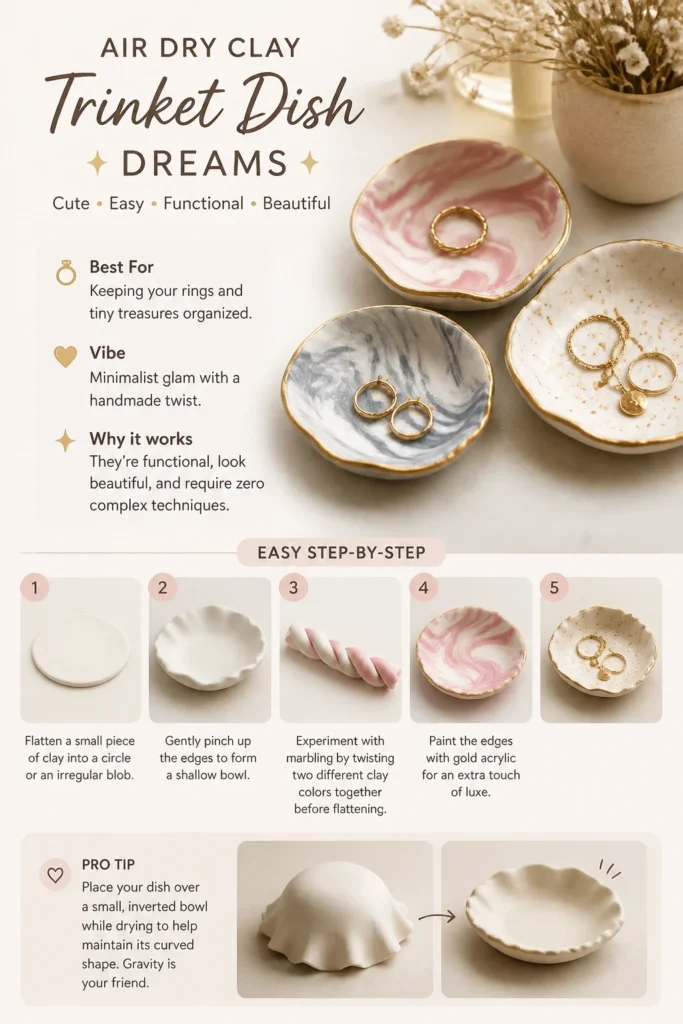
Pro Tip: Place your dish over a small, inverted bowl while drying to help maintain its curved shape. Gravity is your friend.
4. Adorable Keychains
- Best For: Gifting to your besties or jazzing up your own keys.
- Vibe: Playful, personalized, pocket-sized joy.
- Why it works: They’re small, quick to make, and infinitely customizable.
Roll out clay and use mini cookie cutters for shapes like stars, hearts, or tiny animals. Don’t forget to poke a hole at the top with a skewer before drying. Once dry, paint them with bright, contrasting colors and thread them onto a keychain ring.
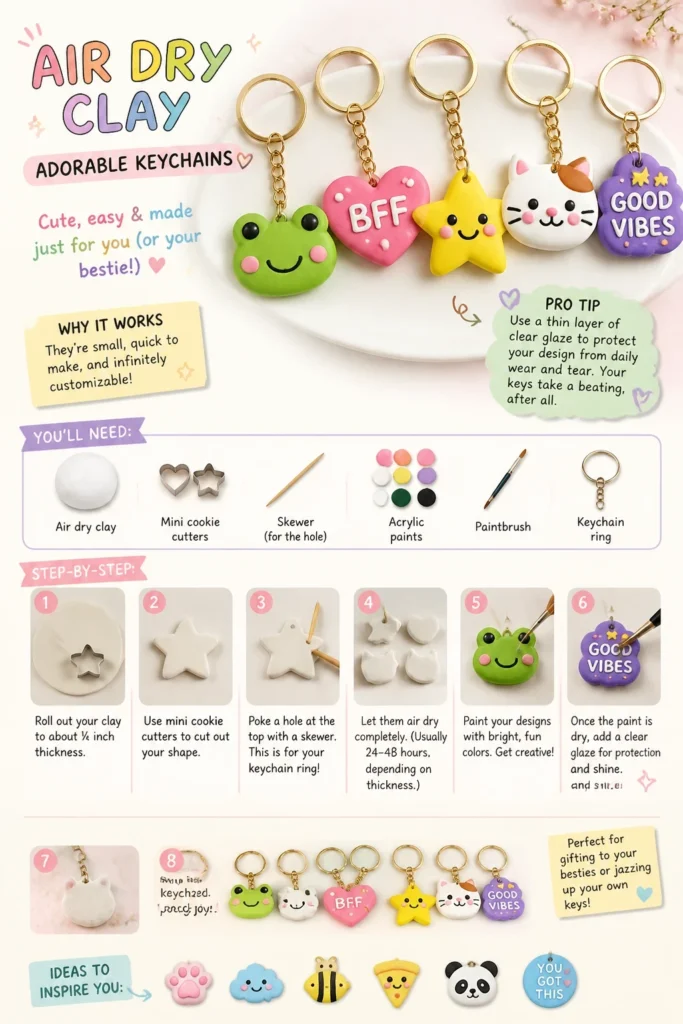
Pro Tip: Use a thin layer of clear glaze to protect your painted design from daily wear and tear. Your keys take a beating, after all.
5. Quirky Fridge Magnets
- Best For: Adding personality to your kitchen command center.
- Vibe: Whimsical, fun, a tiny art gallery for your fridge.
- Why it works: They’re super easy to make and a great way to use up small clay scraps.
Mold tiny shapes like miniature donuts, cacti, or abstract blobs. Paint them vibrantly and then glue a small, strong magnet to the back once completely dry. Think about making a set that tells a tiny story on your fridge door.
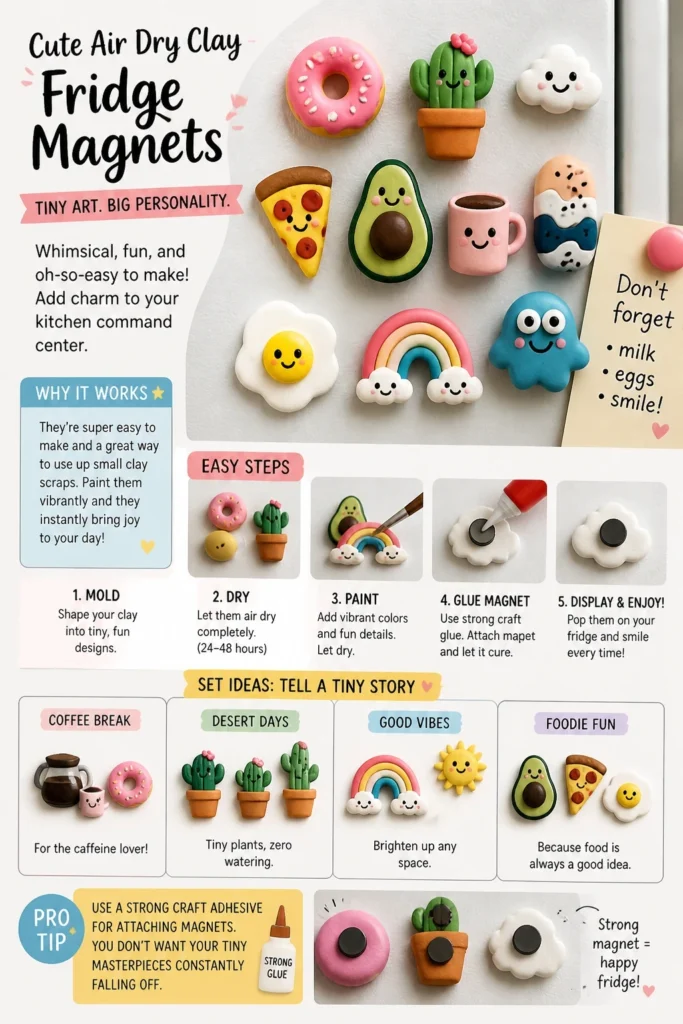
Pro Tip: Use a strong craft adhesive for attaching magnets. You don’t want your tiny masterpieces constantly falling off.
6. Wall Decor Tags
- Best For: Creating custom wall art without breaking the bank.
- Vibe: Minimalist, Scandinavian-inspired, subtly artistic.
- Why it works: They add texture and interest to a plain wall with minimal effort.
Roll out clay and cut various shapes – think rectangles, circles, or organic leaf forms. Poke a hole at the top for hanging. Emboss them with a leaf or a stamped pattern for texture. Paint them in neutral tones like off-white or terracotta, then thread them onto twine.
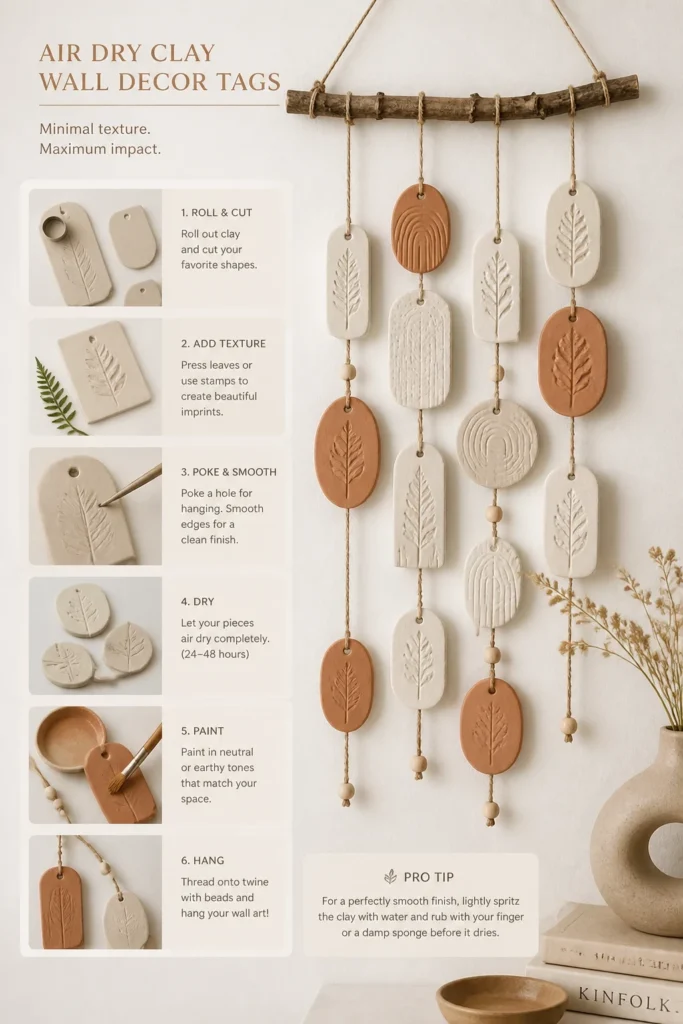
Pro Tip: For a perfectly smooth finish, lightly spritz the clay with water and rub with your finger or a damp sponge before it dries.
7. Mini Fairy Garden Bits
- Best For: Adding magic to indoor plants or creating tiny whimsical scenes.
- Vibe: Enchanting, miniature, utterly charming.
- Why it works: They let your imagination run wild with tiny, adorable creations.
Craft tiny mushrooms with red caps and white dots, or create miniature stepping stones. You can even sculpt a tiny bench for your imaginary garden gnomes. Paint them in bright, cheerful colors to truly bring your tiny world to life.
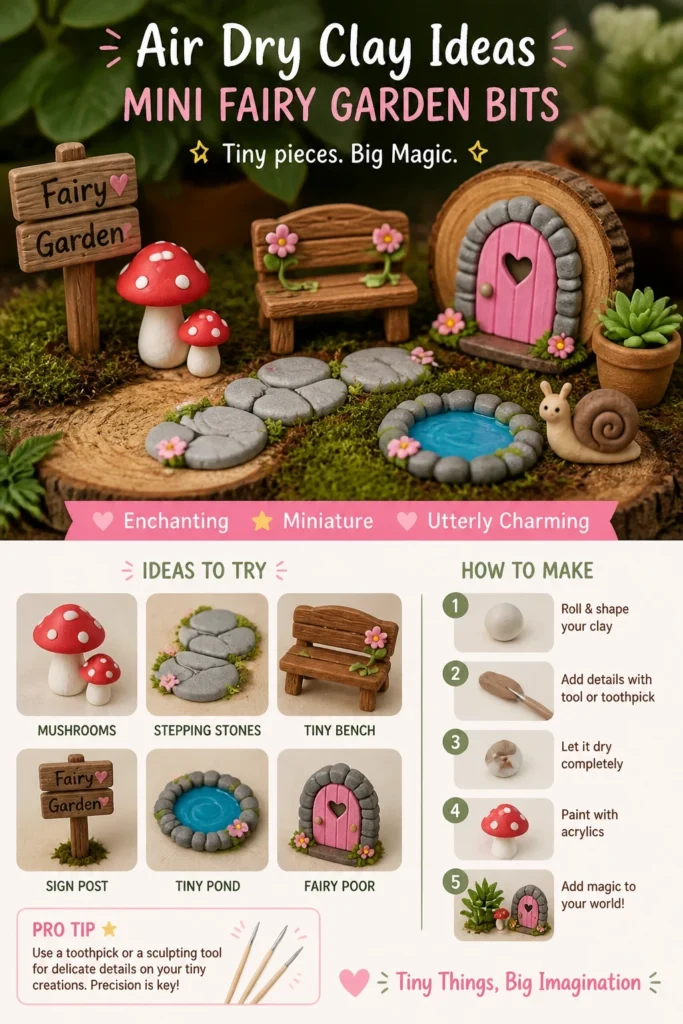
Pro Tip: Use a toothpick or a sculpting tool for delicate details on your tiny creations. Precision is key when you’re dealing with fairy-sized furniture.
8. Simple Pinch Pots
- Best For: Your very first foray into the world of clay crafting.
- Vibe: Rustic, organic, perfectly imperfect.
- Why it works: It’s the most basic technique and yields charming results every time.
Start with a ball of clay, then use your thumb to press a hole in the center. Pinch outwards, rotating the pot as you go, to expand the walls evenly. Don’t worry about perfection; the irregular shape is part of its charm. Paint it a solid color or leave it natural.
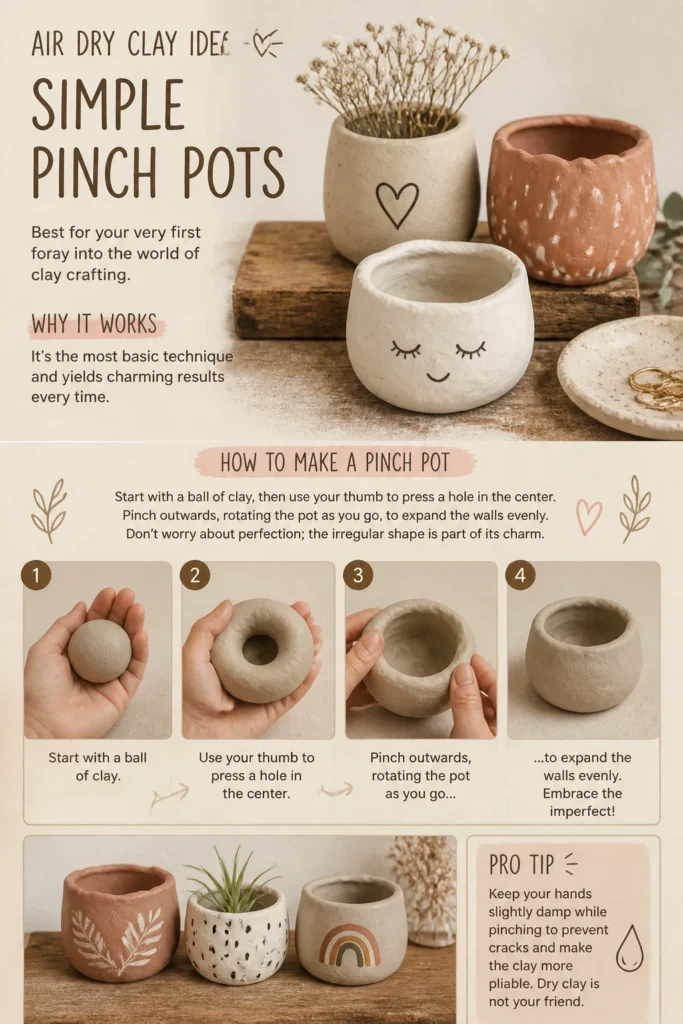
Pro Tip: Keep your hands slightly damp while pinching to prevent cracks and make the clay more pliable. Dry clay is not your friend.
9. Bookmark Charms
- Best For: Sprucing up your reading experience or gifting to fellow bookworms.
- Vibe: Literary chic, subtly whimsical, personalized page-turner.
- Why it works: They’re small, quick to make, and add a delightful touch to any book.
Roll out thin pieces of clay and cut small, flat shapes like leaves, stars, or abstract squiggles. Remember to poke a small hole at one end. Once dry, paint them with metallic accents or small patterns, then thread them onto a pretty ribbon or cord.
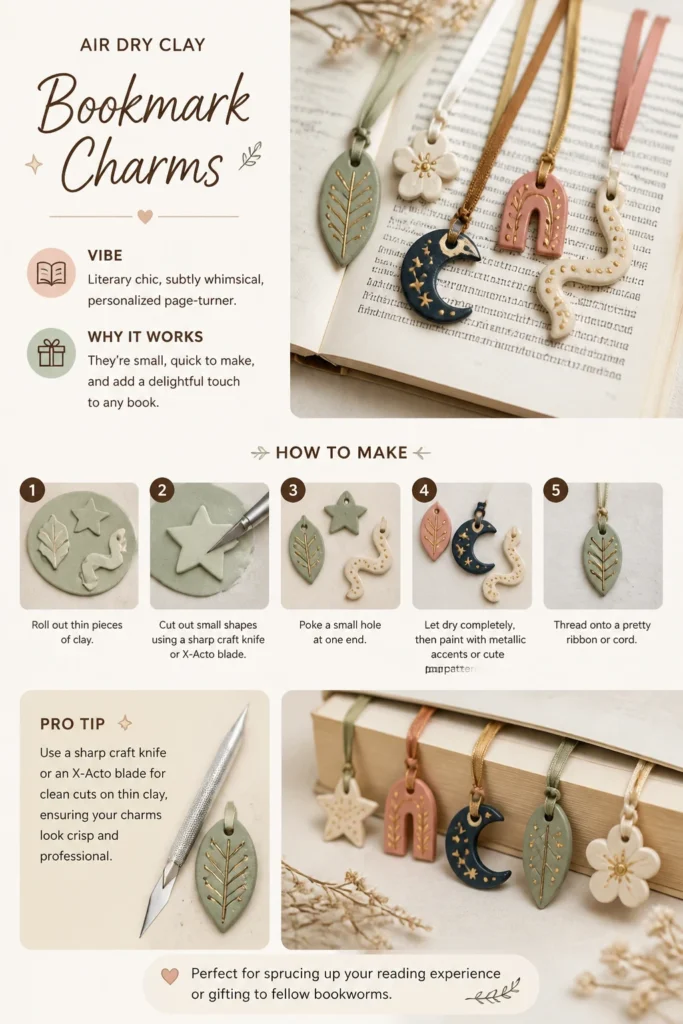
Pro Tip: Use a sharp craft knife or an X-Acto blade for clean cuts on thin clay, ensuring your charms look crisp and professional.
10. Decorative Candle Cozies
- Best For: Adding a touch of handmade elegance to your favorite pillar candles.
- Vibe: Cozy, hygge, softly glowing ambiance.
- Why it works: They elevate simple candles into stylish home decor pieces.
Roll out a slab of clay long enough to wrap around a small pillar candle (not a votive, safety first!). Create cutouts with mini cookie cutters or freehand designs. Wrap it around the candle, gently pressing the edges together, then remove the candle before drying. Paint it in serene colors like cream or soft grey.
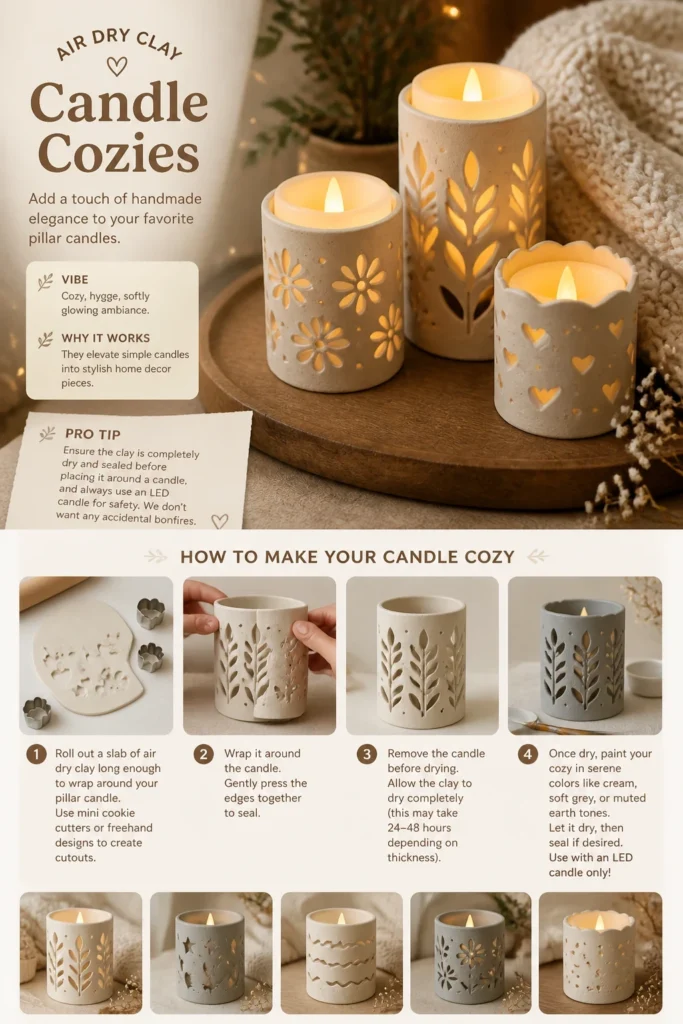
Pro Tip: Ensure the clay is completely dry and sealed before placing it around a candle, and always use an LED candle for safety. We don’t want any accidental bonfires.
11. Simple Phone Stands
- Best For: Hands-free video calls or watching recipes while cooking.
- Vibe: Functional minimalist, surprisingly sturdy.
- Why it works: They’re incredibly useful and easier to make than you think.
Roll out a rectangular slab of clay about 1/4 inch thick. Fold one end up to create a lip for your phone to rest against, and fold the other end down to create a stable base. Smooth out all edges. Paint it a solid color or keep it natural for a clean look.
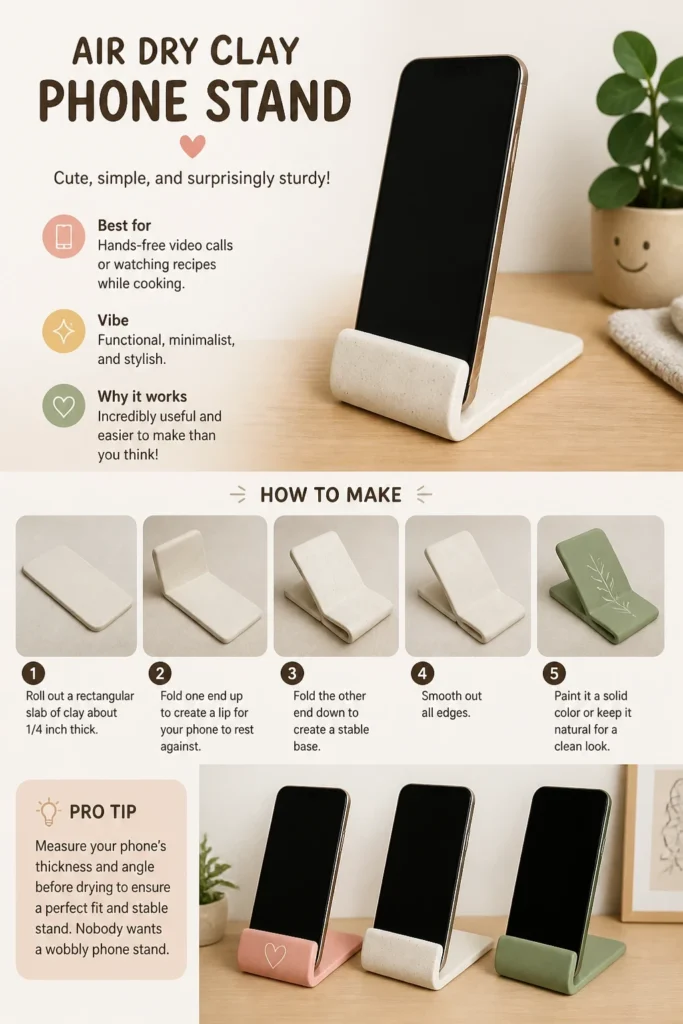
Pro Tip: Measure your phone’s thickness and angle before drying to ensure a perfect fit and stable stand. Nobody wants a wobbly phone stand.
Our Top Recommended Finds
You’ve got the ideas, now grab some essentials to make these projects a breeze. Trust us, these make a difference.
- Good Quality Air Dry Clay: Not all clays are created equal. A smooth, pliable clay makes sculpting way less frustrating and prevents cracks.
- Acrylic Paint Set: A basic set with primary colors lets you mix almost any shade you can dream up for those finishing touches.
- Clear Craft Sealant/Varnish: This is your secret weapon for durability and a professional finish, protecting your masterpieces from moisture and wear.
Which of these will you try first?
Seriously, air dry clay is the unsung hero of easy, cute crafting. You don’t need a fancy studio or years of experience to make something genuinely adorable.
So, which one are you diving into this weekend? Let us know in the comments. We’re always here for your creative triumphs!