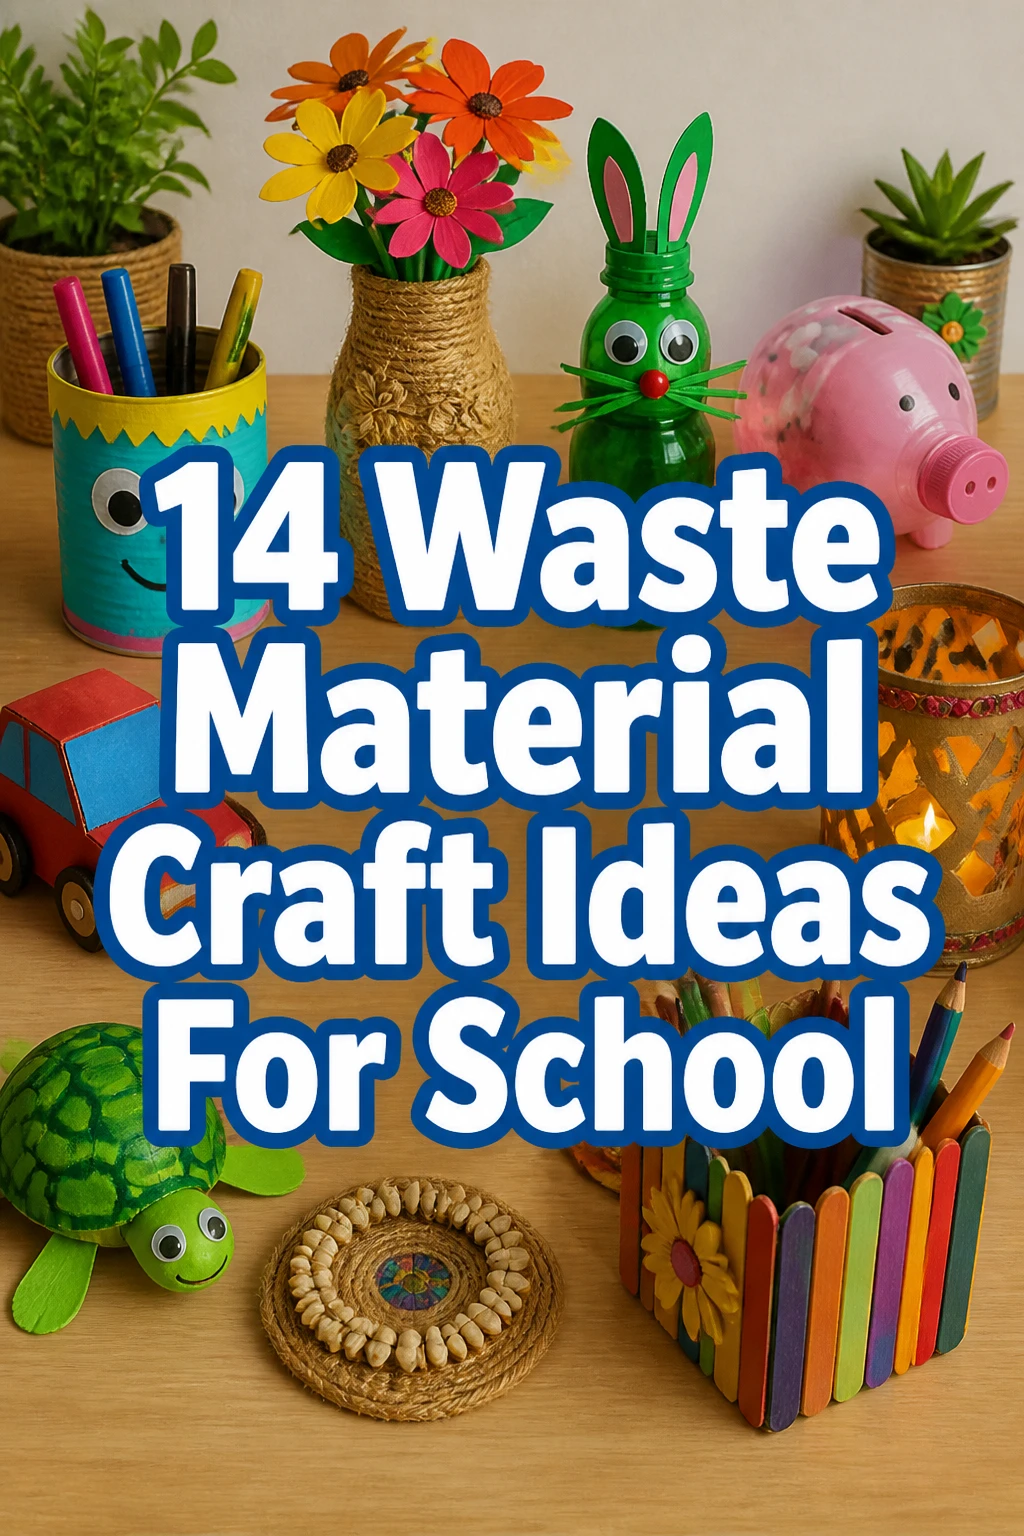
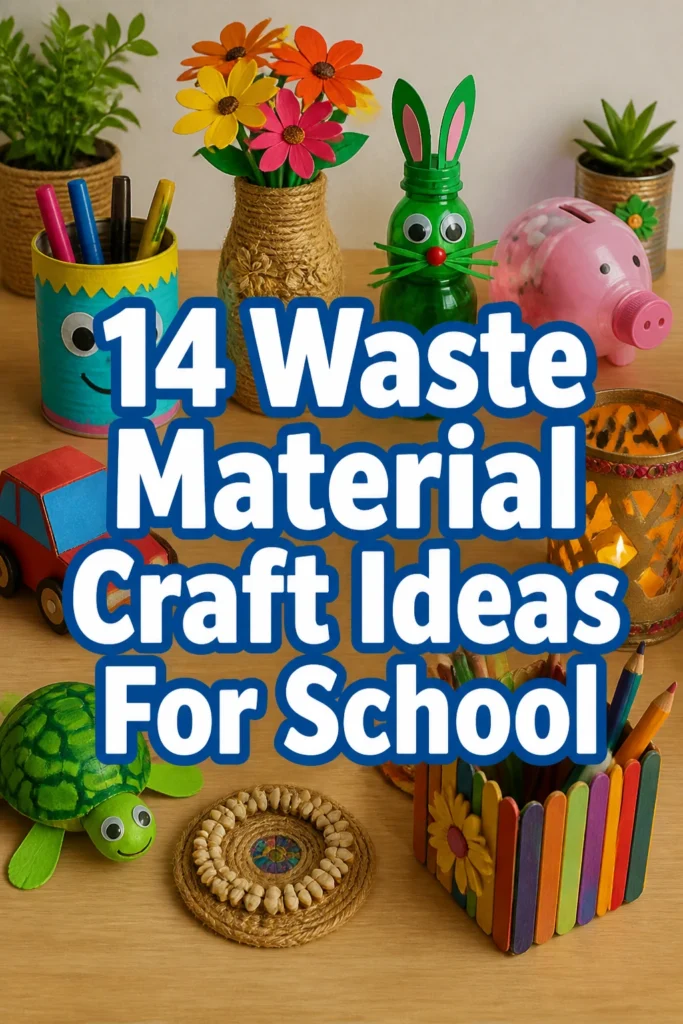
14 Waste Material Craft Ideas For School
Staring at that mountain of “stuff” your kid brings home from school, wondering if it’s art or just trash?
Yeah, we’ve all been there. But what if that “trash” was actually treasure, just waiting for a glow-up?
Get ready to turn those would-be discards into seriously cool school projects with these brilliant waste material craft ideas.
1. CD Mosaic Coasters
- Best For: Art class, thoughtful gift making.
- Vibe: Retro-chic, sparkly, surprisingly sophisticated.
- Why it works: Upcycles old tech waste into functional, eye-catching art.
You know those ancient CDs gathering dust? Shatter them (safely, please!) into tiny pieces and glue them onto cardboard squares. Fill in the gaps with a little grout or just let the irregular edges shine.
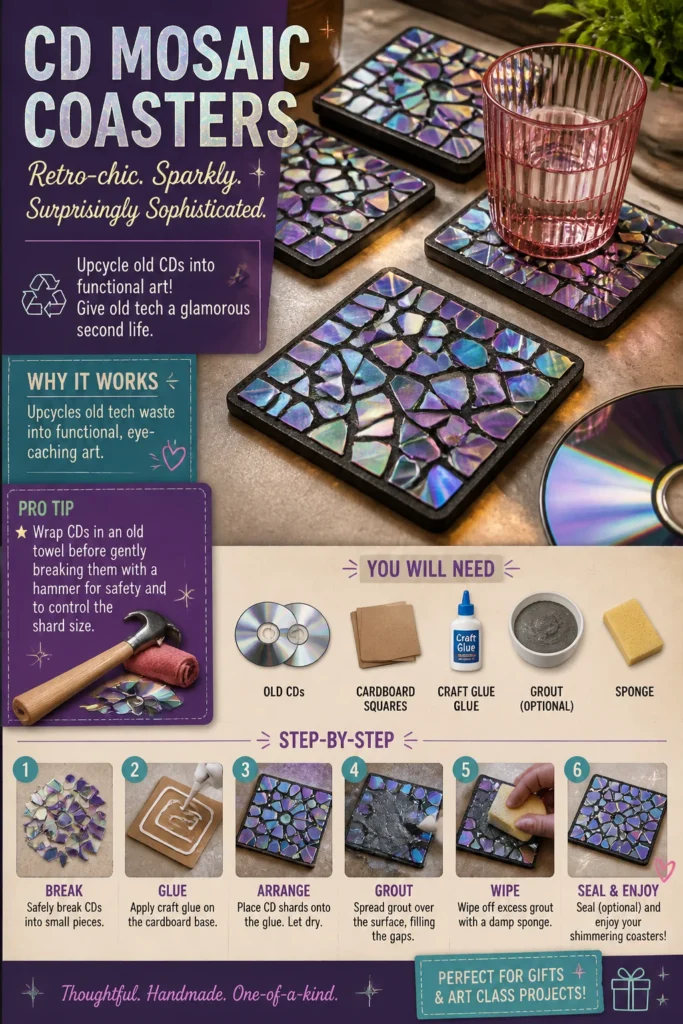
The iridescent shimmer is totally mesmerizing, and you just saved another disc from landfill oblivion. Your coffee table will thank you.
Pro Tip: Wrap CDs in an old towel before gently breaking them with a hammer for safety and to control the shard size.
2. Cereal Box Desk Organizers
- Best For: Desk organization, classroom supply holders.
- Vibe: Tidy, personalized, super functional.
- Why it works: Transforms everyday packaging into essential, custom storage.
Grab a few empty cereal boxes, cut them to varying heights, and then get wild covering them with cool decorative paper or fabric scraps. Glue them together for a multi-compartment masterpiece.
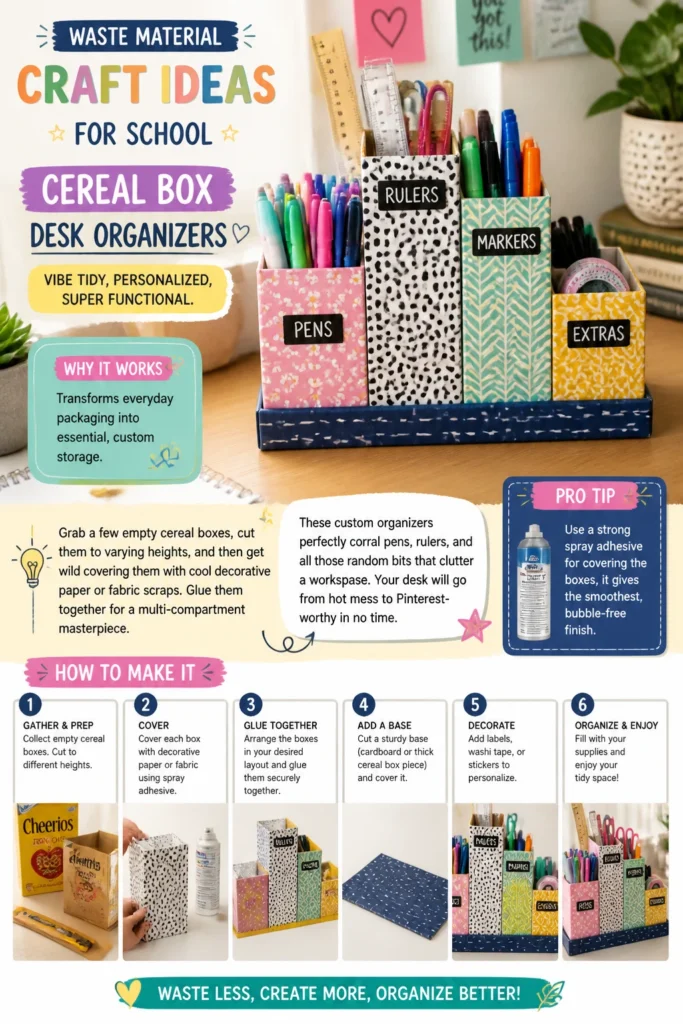
These custom organizers perfectly corral pens, rulers, and all those random bits that clutter a workspace. Your desk will go from “hot mess” to “Pinterest-worthy” in no time.
Pro Tip: Use a strong spray adhesive for covering the boxes; it gives the smoothest, bubble-free finish.
3. Plastic Bottle Planters
- Best For: Science projects, windowsill decor, green thumbs in training.
- Vibe: Whimsical, eco-friendly, mini-garden chic.
- Why it works: Gives plastic bottles a second life as a self-watering mini ecosystem.
Snag some 2-liter PET bottles, cut them in half, and then invert the top portion into the bottom to create a self-watering system. Paint adorable animal faces or geometric patterns on them.
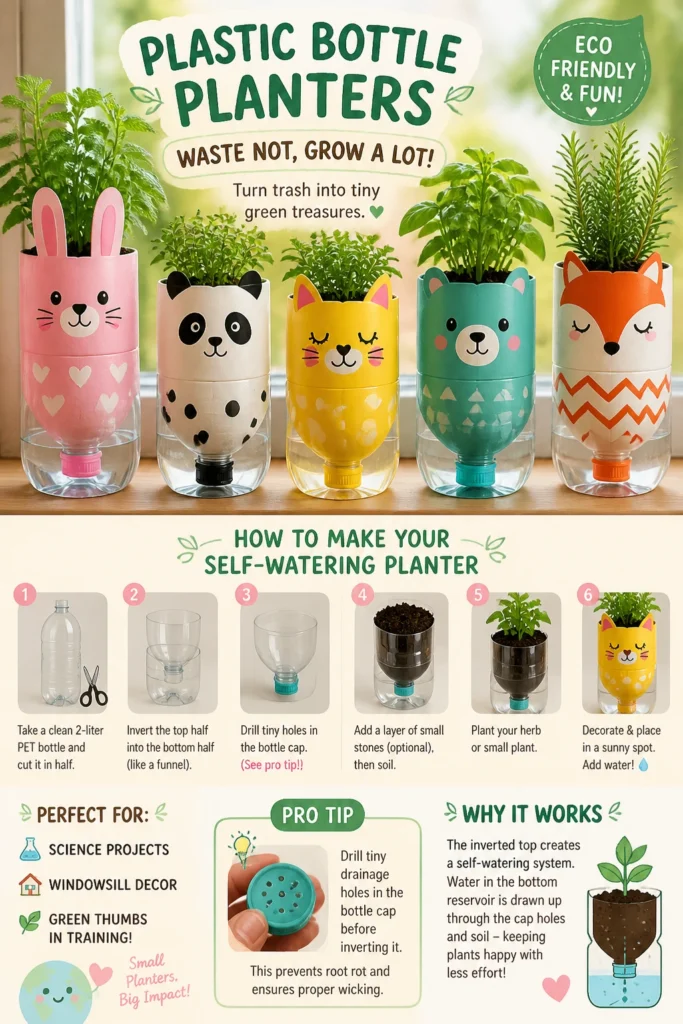
These little guys are perfect for growing herbs or small plants, making plant care super easy for busy students. Plus, they look ridiculously cute lined up on a sunny sill.
Pro Tip: Drill tiny drainage holes in the bottle cap before inverting it; this prevents root rot and ensures proper wicking.
4. Egg Carton Critters
- Best For: Younger grades, biology lessons, imaginative play.
- Vibe: Cute, educational, endlessly creative.
- Why it works: Simple, accessible, and sparks immediate creative transformation.
Individual egg carton cups are basically pre-made bodies for all sorts of creatures. Paint them as vibrant ladybugs, fuzzy caterpillars, or even quirky spiders with pipe cleaner legs.
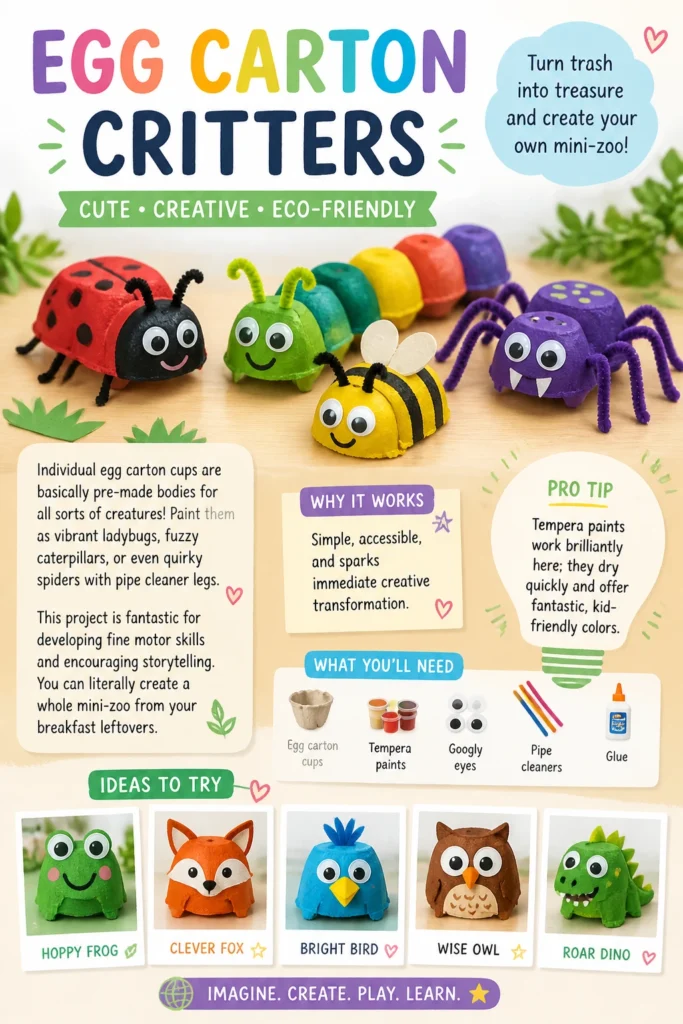
This project is fantastic for developing fine motor skills and encouraging storytelling. You can literally create a whole mini-zoo from your breakfast leftovers.
Pro Tip: Tempera paints work brilliantly here; they dry quickly and offer fantastic, kid-friendly colors.
5. Toilet Paper Roll Binoculars
- Best For: Pretend play, nature walks, history class props.
- Vibe: Adventurous, playful, wonderfully simple.
- Why it works: Transforms basic cardboard tubes into a prop for exploration and imagination.
Glue two toilet paper rolls side-by-side, punch a couple of holes, thread some string through, and you’ve got instant binoculars. Decorate them with paint, glitter, or whatever strikes your fancy.
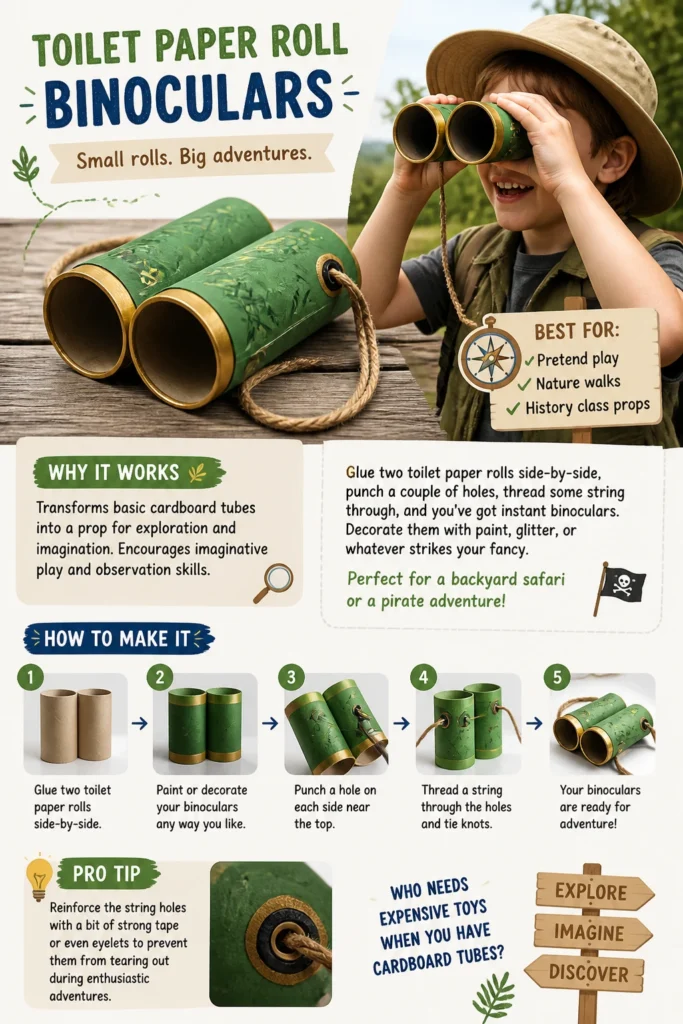
Perfect for a backyard safari or a pirate adventure, these encourage imaginative play and observation skills. Who needs expensive toys when you have cardboard tubes?
Pro Tip: Reinforce the string holes with a bit of strong tape or even eyelets to prevent them from tearing out during enthusiastic adventures.
6. Newspaper Art Frames
- Best For: Art display, school fairs, showcasing masterpieces.
- Vibe: Rustic, textured, surprisingly artistic.
- Why it works: Creates a unique, recycled frame for student artwork.
Roll old newspapers into tight, thin tubes, flatten them slightly, and then arrange and glue them onto a cardboard backing to form a frame. Paint or varnish them for a polished look.
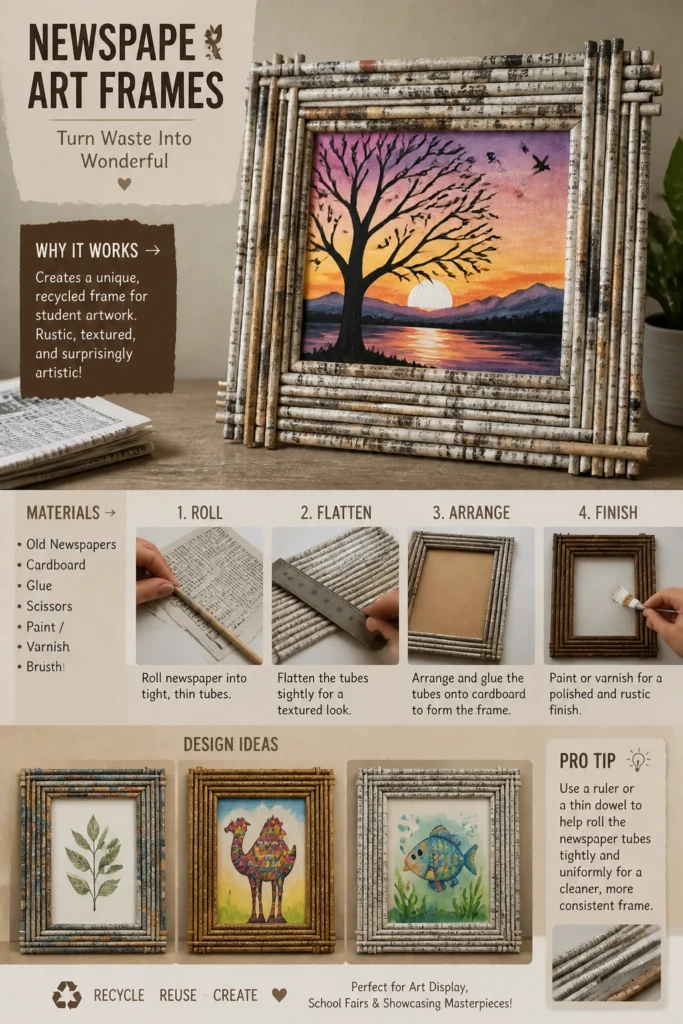
The rolled paper creates a fantastic texture that looks surprisingly sophisticated when finished. It’s a brilliant way to elevate any drawing or painting without buying new materials.
Pro Tip: Use a ruler or a thin dowel to help roll the newspaper tubes tightly and uniformly for a cleaner, more consistent frame.
7. Milk Jug Storage Caddies
- Best For: Classroom supplies, art tools, small toy storage.
- Vibe: Practical, sturdy, infinitely customizable.
- Why it works: Turns bulky plastic jugs into portable, durable storage solutions.
Grab a clean plastic milk jug (gallon size works best), carefully cut off the top to create a handle, and then let the decorating commence. Think bright paints or even fabric scraps.
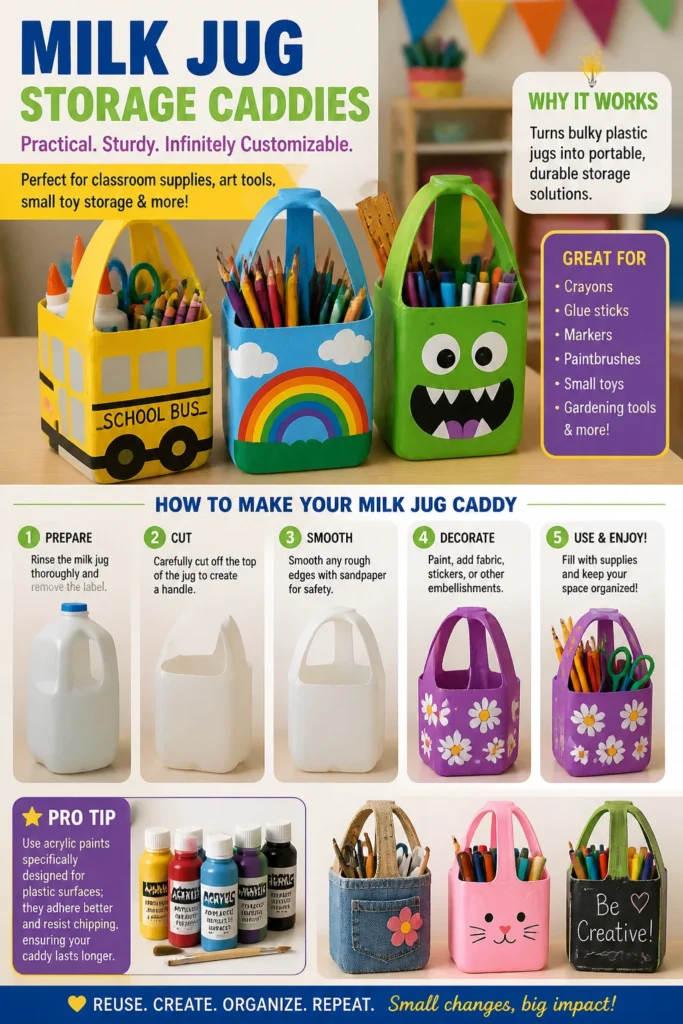
These caddies are surprisingly durable and perfect for holding crayons, glue sticks, or even small gardening tools. They are a true workhorse for keeping things tidy.
Pro Tip: Use acrylic paints specifically designed for plastic surfaces; they adhere better and resist chipping, ensuring your caddy lasts longer.
8. Bottle Cap Mosaics
- Best For: Group projects, wall art, exploring patterns.
- Vibe: Pop art, colorful, collaborative cool.
- Why it works: Uses small, often overlooked plastic waste for vibrant, textural art.
Start collecting plastic bottle caps in all sorts of colors and sizes. Then, arrange them into intricate patterns or images on a sturdy cardboard base using strong adhesive.
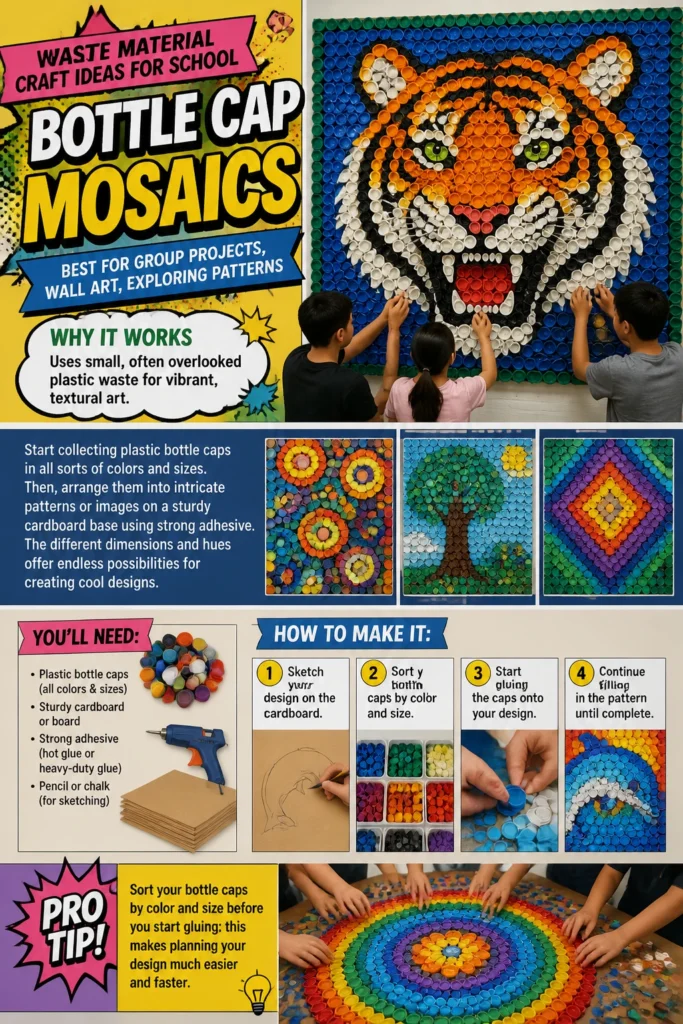
The different dimensions and hues offer endless possibilities for creating cool designs. Imagine a giant school mascot or a colorful abstract piece made entirely of caps.
Pro Tip: Sort your bottle caps by color and size before you start gluing; this makes planning your design much easier and faster.
9. Cardboard Box Puppet Theater
- Best For: Drama class, storytelling, imaginative play.
- Vibe: Theatrical, engaging, full of dramatic potential.
- Why it works: Transforms a simple box into a stage for endless stories and performances.
Find a large cardboard box, cut out a stage opening, and then go wild decorating it with paint, fabric scraps, and maybe even some tiny curtains. This is where the magic happens.
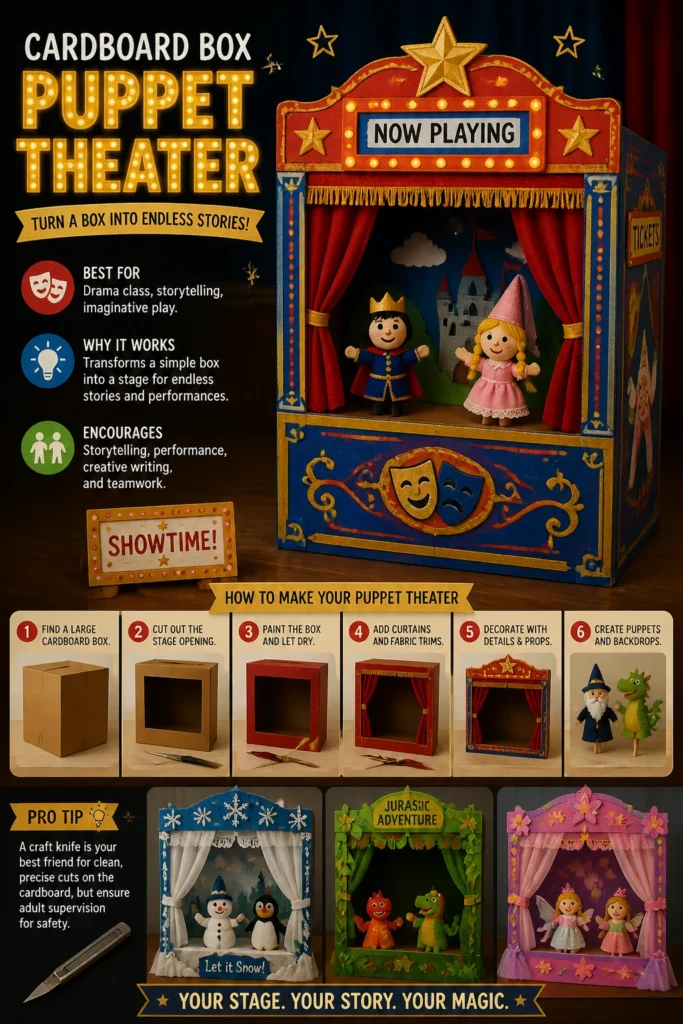
This project absolutely encourages storytelling, performance, and creative writing. Kids can design their own backdrops and characters, bringing their wildest tales to life.
Pro Tip: A craft knife is your best friend for clean, precise cuts on the cardboard, but ensure adult supervision for safety.
10. Old T-Shirt Yarn Bracelets
- Best For: Fashion projects, gift making, fine motor skill development.
- Vibe: Boho-chic, crafty, uniquely personal.
- Why it works: Upcycles fabric waste into stylish, wearable art with zero cost.
Grab those old t-shirts you were about to donate, cut them into long strips, and then stretch them out until they curl into “yarn.” Braid or knot them into cool bracelets.
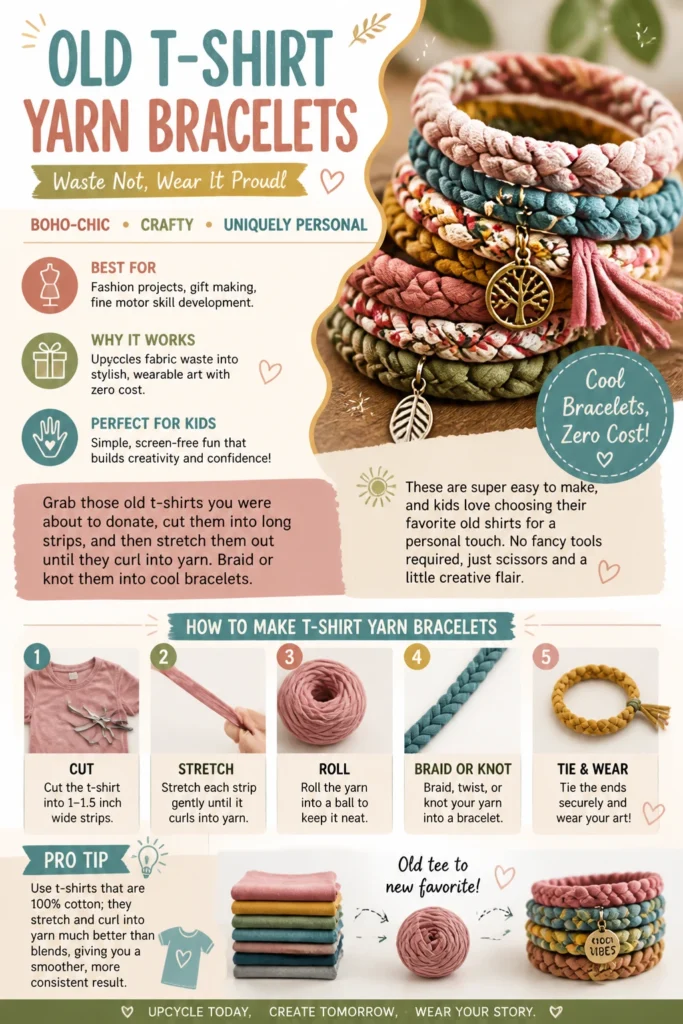
These are super easy to make, and kids love choosing their favorite old shirts for a personal touch. No fancy tools required, just scissors and a little creative flair.
Pro Tip: Use t-shirts that are 100% cotton; they stretch and curl into yarn much better than blends, giving you a smoother, more consistent result.
11. Newspaper Seedling Pots
- Best For: Science class, gardening club, environmental studies.
- Vibe: Green, temporary, perfectly biodegradable.
- Why it works: Creates compostable pots for starting seeds that reduce plastic waste.
Wrap strips of newspaper around a cylindrical object like a tin can or jar, fold the bottom securely, and then carefully remove the cylinder. Boom, instant seed pot.
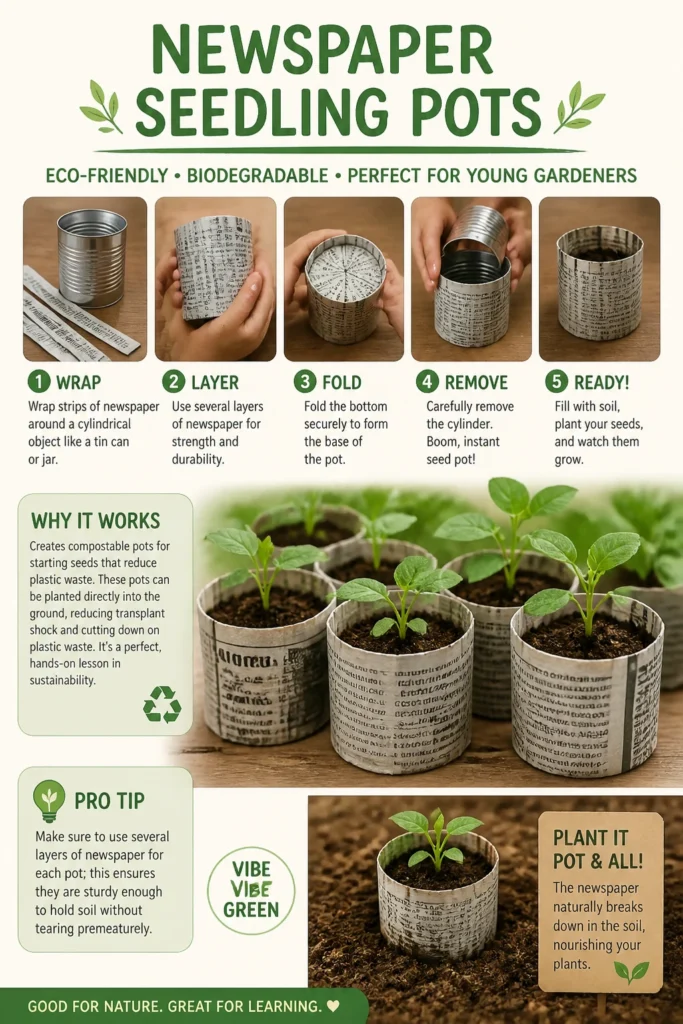
These ingenious pots can be planted directly into the ground, reducing transplant shock and cutting down on plastic waste. It’s a perfect, hands-on lesson in sustainability.
Pro Tip: Make sure to use several layers of newspaper for each pot; this ensures they are sturdy enough to hold soil without tearing prematurely.
12. Plastic Bag Weaving Mat
- Best For: Art class, environmental projects, practical outdoor use.
- Vibe: Resourceful, textured, incredibly durable.
- Why it works: Repurposes single-use plastic into something lasting and useful.
Cut plastic grocery bags into long strips, creating “plarn” (plastic yarn). Loop these strips onto a simple DIY loom or a sturdy frame, and start weaving them into a mat.
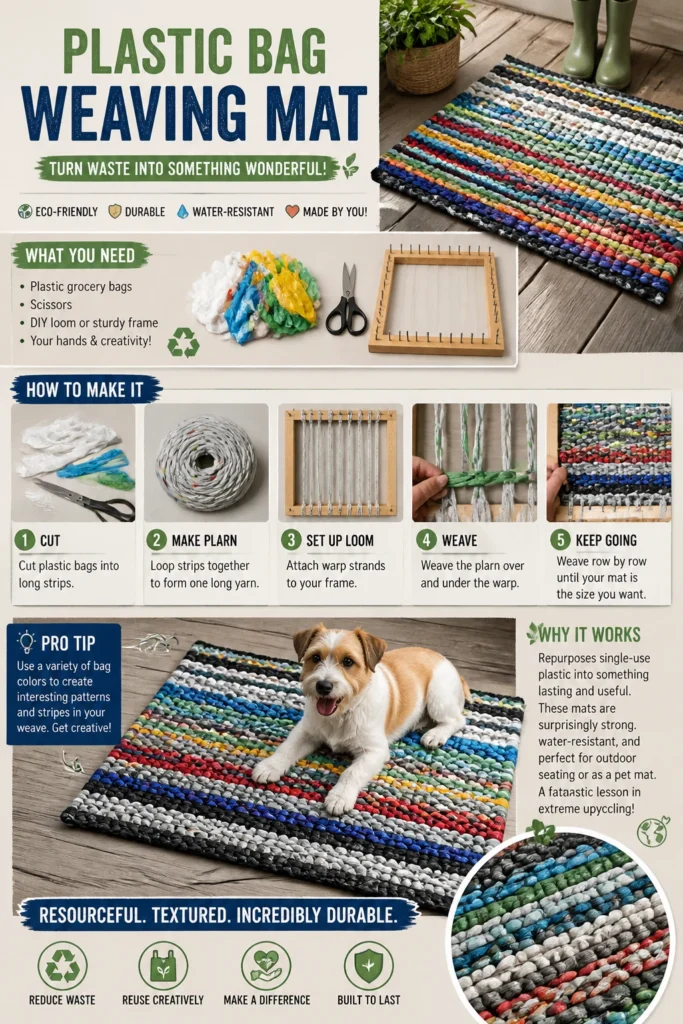
These mats are surprisingly strong, water-resistant, and perfect for outdoor seating or as a pet mat. It’s a fantastic, tangible lesson in extreme upcycling.
Pro Tip: Use a variety of bag colors to create interesting patterns and stripes in your weave, making the final mat even more visually appealing.
13. Cardboard Tube Castles
- Best For: History projects, architectural studies, epic creative play.
- Vibe: Grand, historical, full of imaginative scope.
- Why it works: Transforms simple tubes into impressive, multi-level structures.
Collect various cardboard tubes (paper towel, wrapping paper, even toilet paper rolls), cut them to different heights for towers, and attach them to a sturdy cardboard base. Add battlements, windows, and flags.
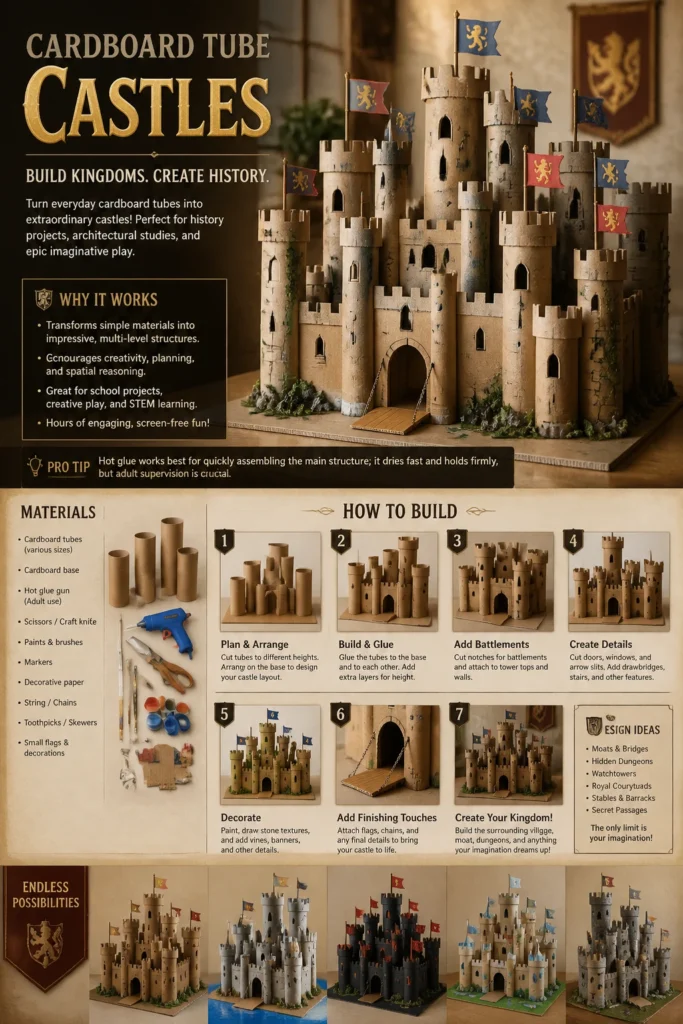
Kids can design an entire kingdom, complete with drawbridges and dungeons. This project strongly encourages spatial reasoning and detailed planning, not to mention hours of fun.
Pro Tip: Hot glue works best for quickly assembling the main structure; it dries fast and holds firmly, but adult supervision is crucial.
14. Tin Can Stilts
- Best For: Physical education, recess fun, balance practice.
- Vibe: Playful, active, delightfully old-school.
- Why it works: Creates a fun, active toy from discarded cans, promoting coordination.
Grab two large, clean tin cans (coffee cans are perfect), use a hammer and nail to punch two holes near the bottom of each. Thread strong rope through, knotting it securely inside.
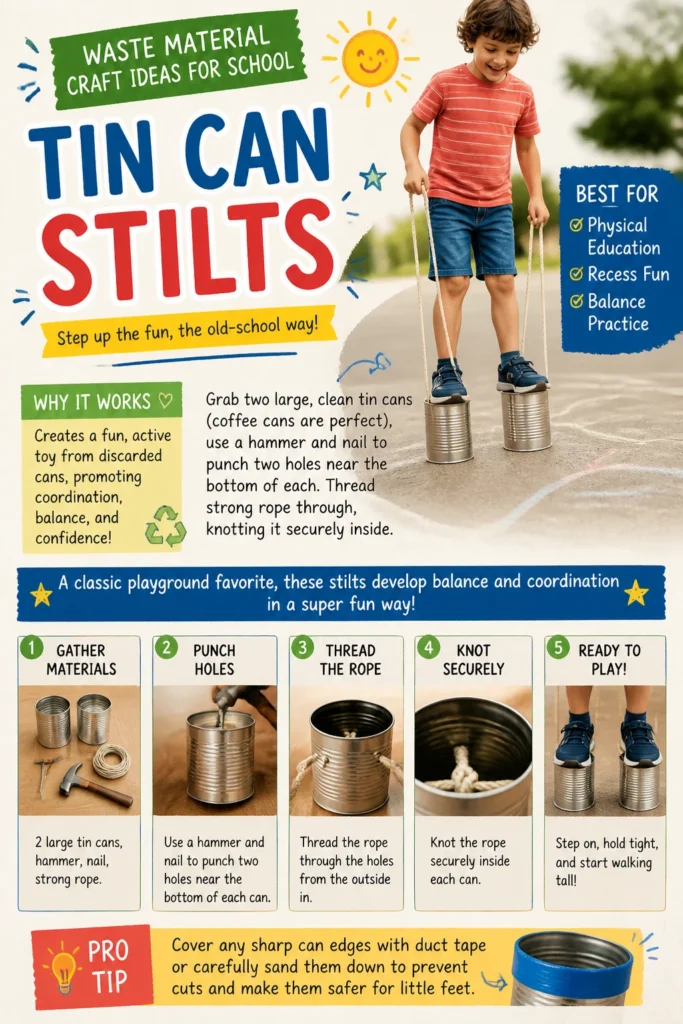
A classic playground favorite, these stilts develop balance and coordination in a super fun way. Just ensure the can edges are smooth and safe before anyone starts walking tall.
Pro Tip: Cover any sharp can edges with duct tape or carefully sand them down to prevent cuts and make them safer for little feet.
Our Top Recommended Finds
- Crafting Scissors Set: For all those tricky cuts on cardboard and fabric, a sharp pair makes all the difference.
- Eco-Friendly Craft Glue: Because nobody wants toxic fumes when crafting, right? Choose a non-toxic, strong adhesive.
- Acrylic Paint Set with Brushes: Get those vibrant colors popping on any surface, from plastic to paper, with a good quality set.
Which of these will you try first?
See? Saving the planet (and your sanity from clutter) can actually be super fun and creative. No need to break the bank for school projects when you’ve got a goldmine in your recycling bin.
So, which of these genius waste material craft ideas for school are you tackling first?