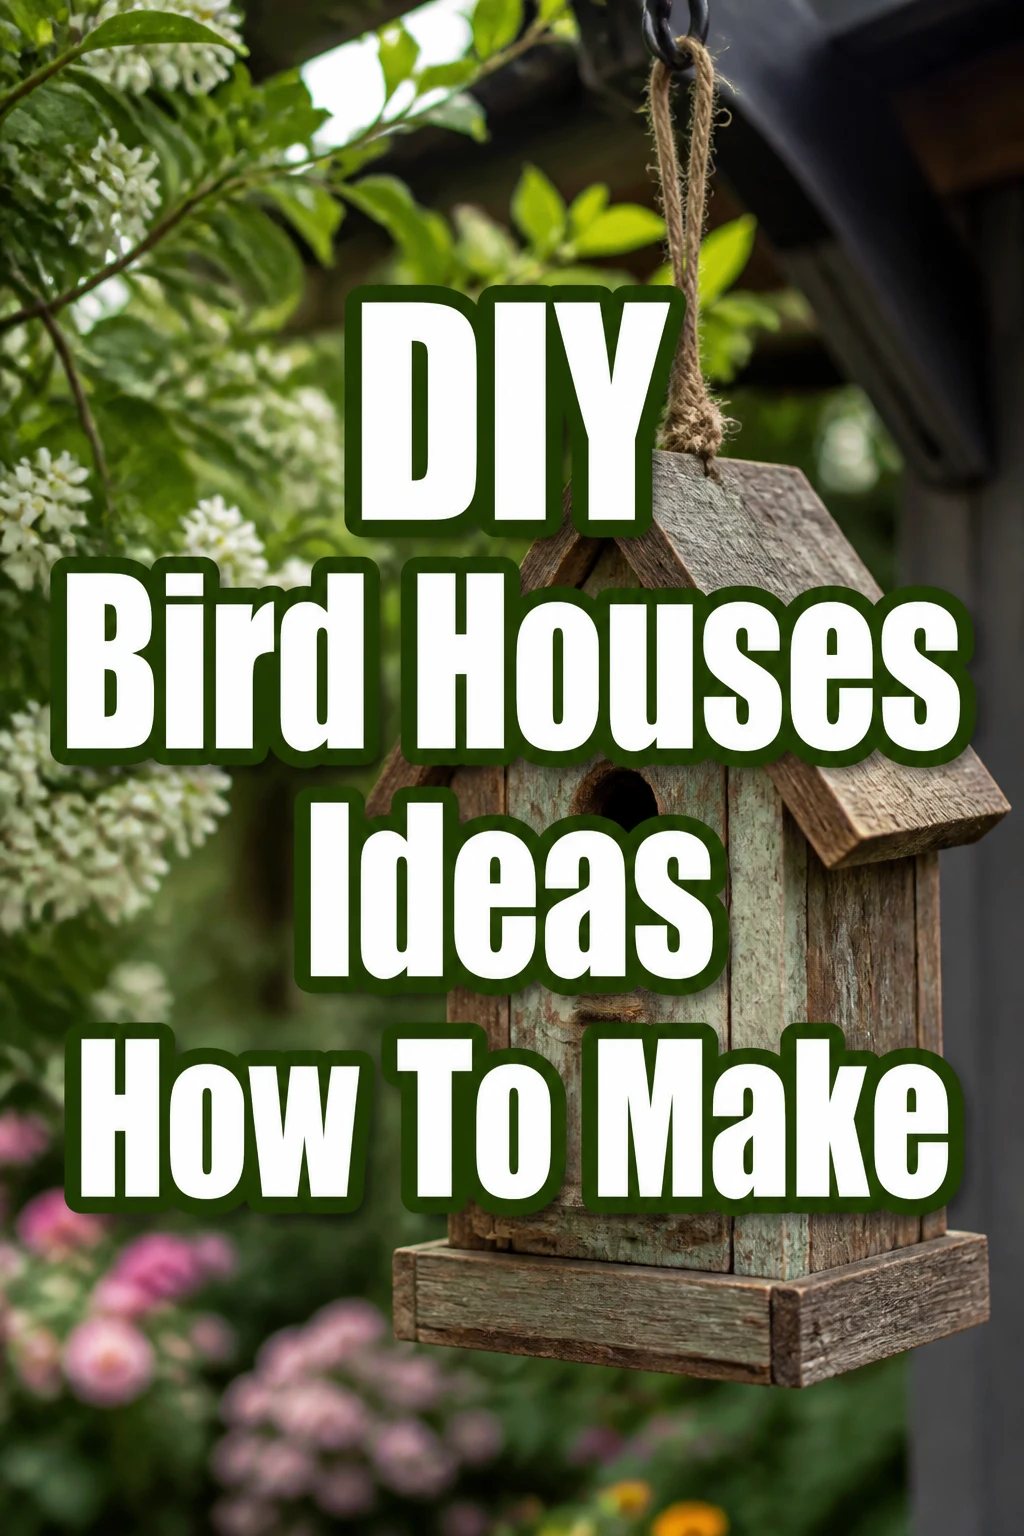
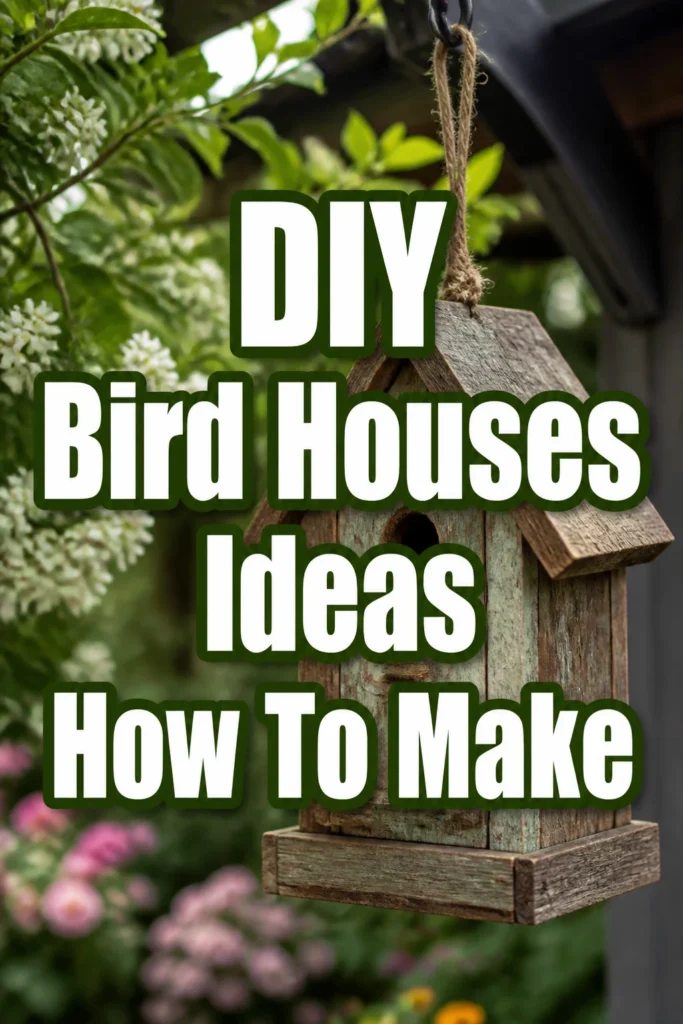
DIY Bird Houses Ideas How To Make
There’s something uniquely satisfying about creating a sanctuary for local wildlife.
I remember building my first birdhouse with my grandfather; it felt like a small act of kindness, and seeing a wren nest there was pure joy.
This guide draws on years of hands-on experience to help you build a safe, welcoming home for your feathered neighbors.
Quick Overview
You’re about to embark on a rewarding project, crafting a functional and charming birdhouse.
This guide will walk you through everything from planning to installation, ensuring your birdhouse is a success.
- Time needed: 4-8 hours (depending on complexity and experience)
- Difficulty: Beginner to Intermediate
- What you’ll need: Untreated wood, saw, drill, screws, measuring tape, safety gear
Step-by-Step Instructions
Step 1: Plan Your Birdhouse Design
Start by considering which bird species you hope to attract. Different birds prefer different house sizes, entrance hole diameters, and heights.
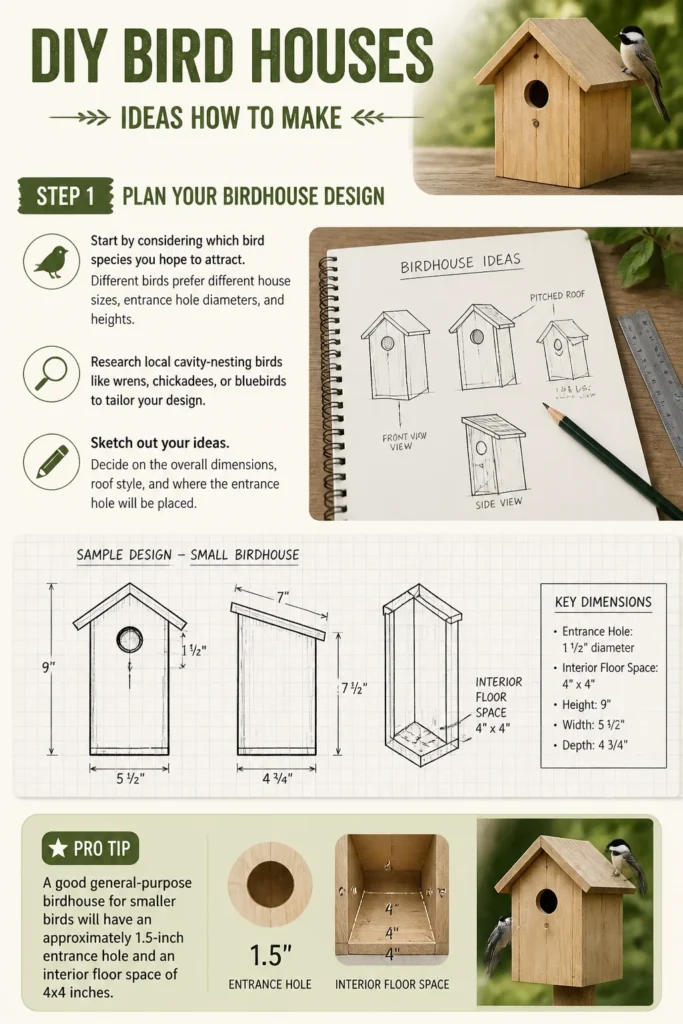
Research local cavity-nesting birds like wrens, chickadees, or bluebirds to tailor your design.
Sketch out your ideas. Decide on the overall dimensions, roof style, and where the entrance hole will be placed.
Pro Tip: A good general-purpose birdhouse for smaller birds will have an approximately 1.5-inch entrance hole and an interior floor space of 4×4 inches.
Step 2: Gather Your Materials and Tools
Select untreated, durable wood like cedar, redwood, pine, or exterior-grade plywood.
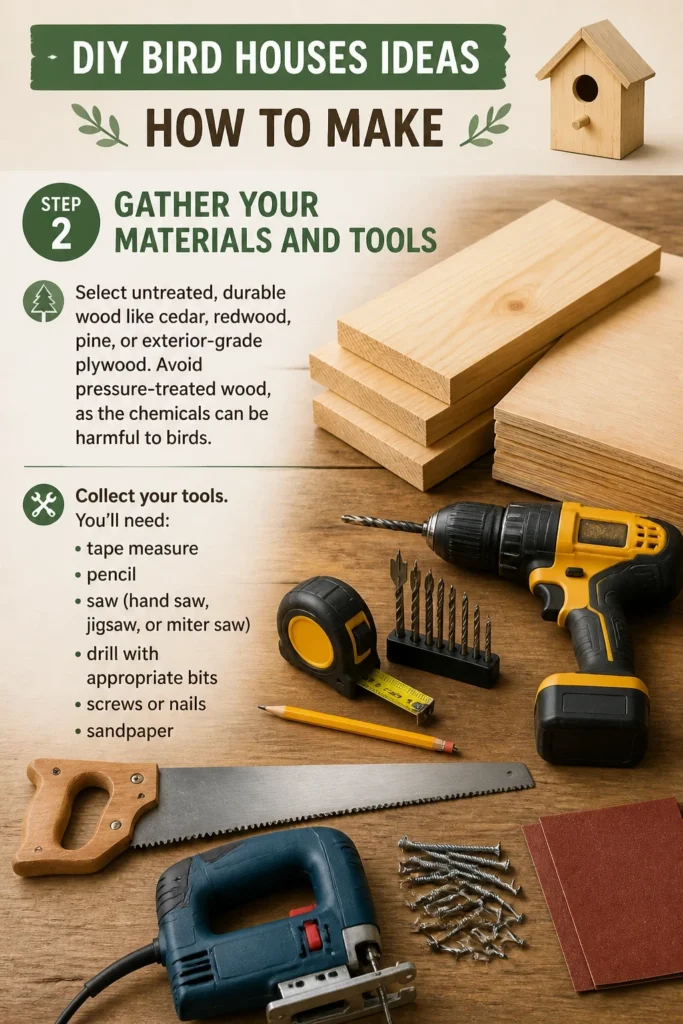
Avoid pressure-treated wood, as the chemicals can be harmful to birds.
Collect your tools. You’ll need a tape measure, pencil, saw (hand saw, jigsaw, or miter saw), drill with appropriate bits, screws or nails, and sandpaper.
Step 3: Measure and Cut the Wood Pieces
Carefully measure and mark all your pieces according to your design plan.
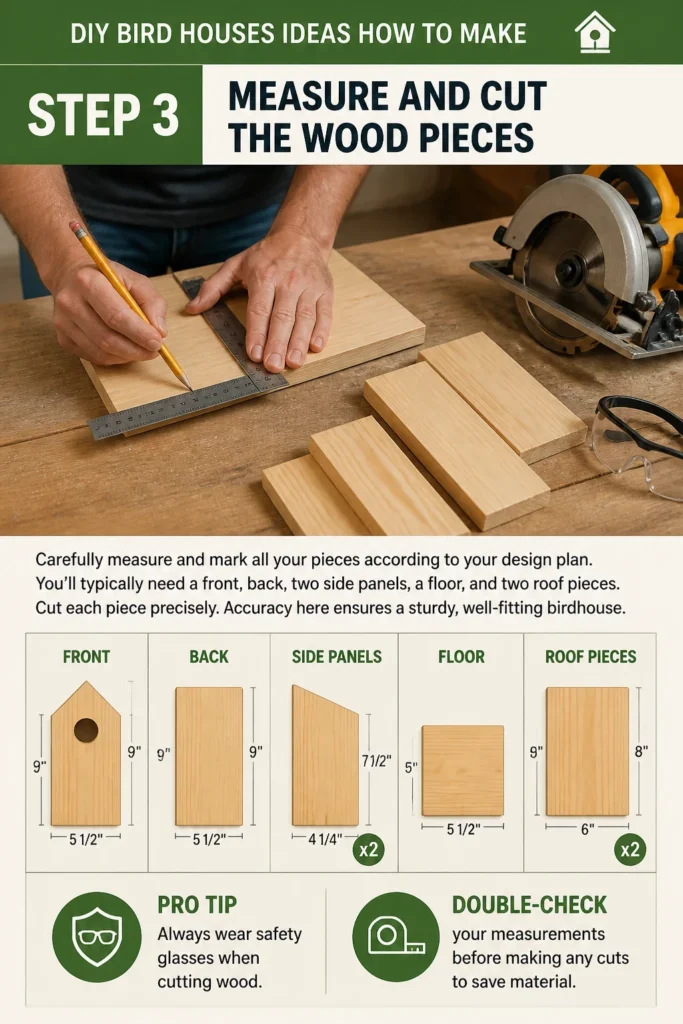
You’ll typically need a front, back, two side panels, a floor, and two roof pieces.
Cut each piece precisely. Accuracy here ensures a sturdy, well-fitting birdhouse.
Pro Tip: Always wear safety glasses when cutting wood. Double-check your measurements before making any cuts to save material.
Step 4: Drill the Entrance Hole and Perch (Optional)
Using a drill with a hole saw bit, create the entrance hole on the front panel.
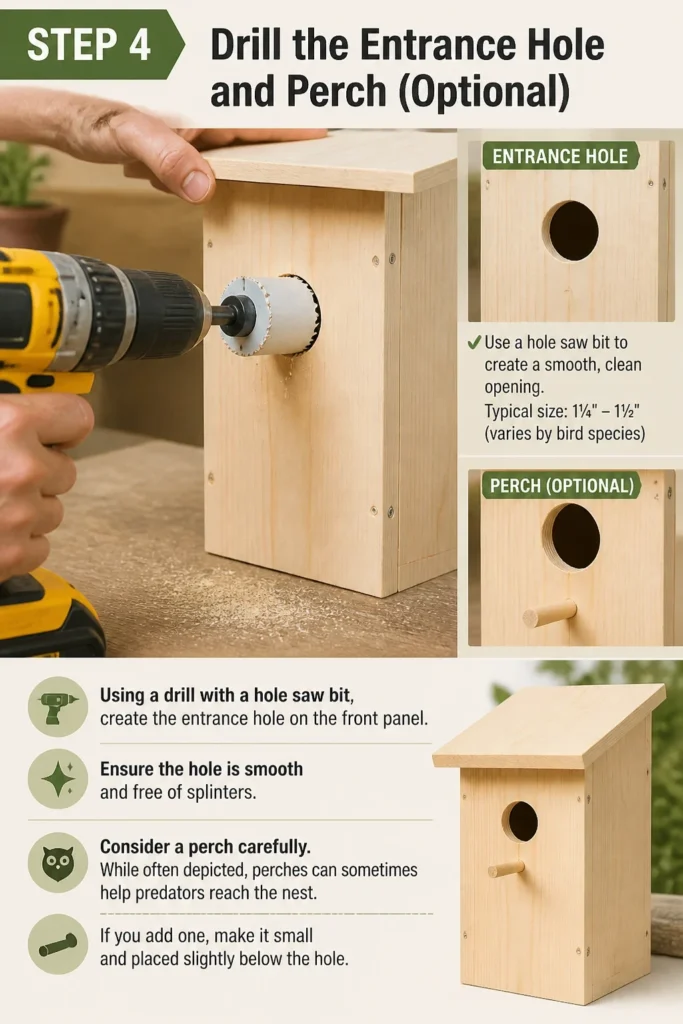
Ensure the hole is smooth and free of splinters.
Consider a perch carefully. While often depicted, perches can sometimes help predators reach the nest.
If you add one, make it small and placed slightly below the hole.
Step 5: Assemble the Birdhouse Base and Walls
Begin by attaching the side panels to the floor piece, using weather-resistant screws or nails.
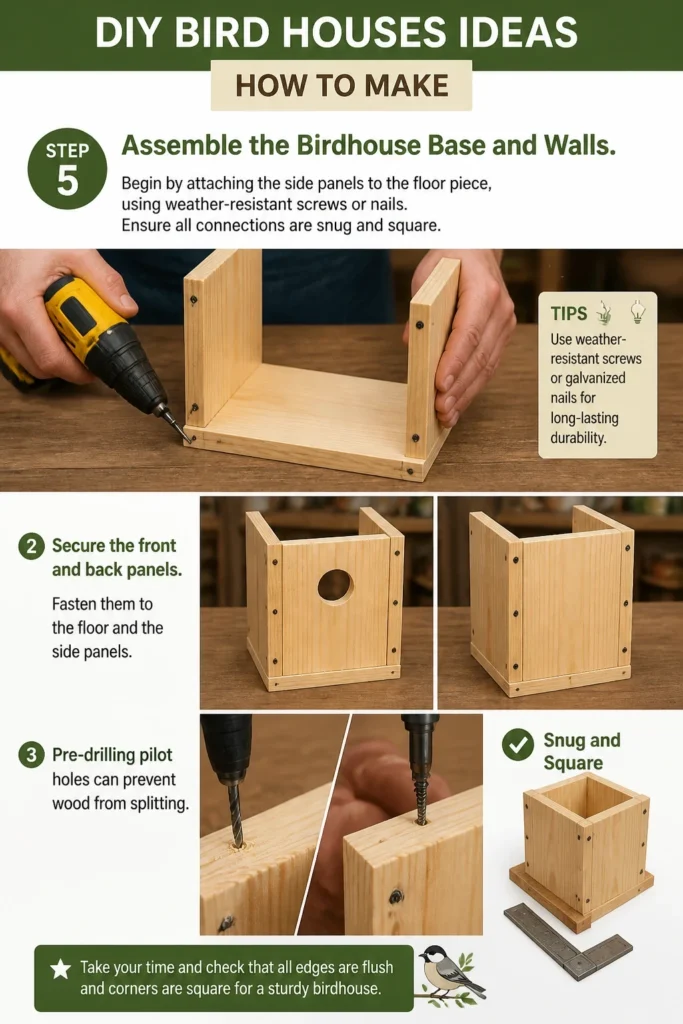
Ensure all connections are snug and square.
Secure the front and back panels. Fasten them to the floor and the side panels.
Pre-drilling pilot holes can prevent wood from splitting.
Step 6: Attach the Roof
Design the roof with an overhang to protect the entrance from rain and sun.
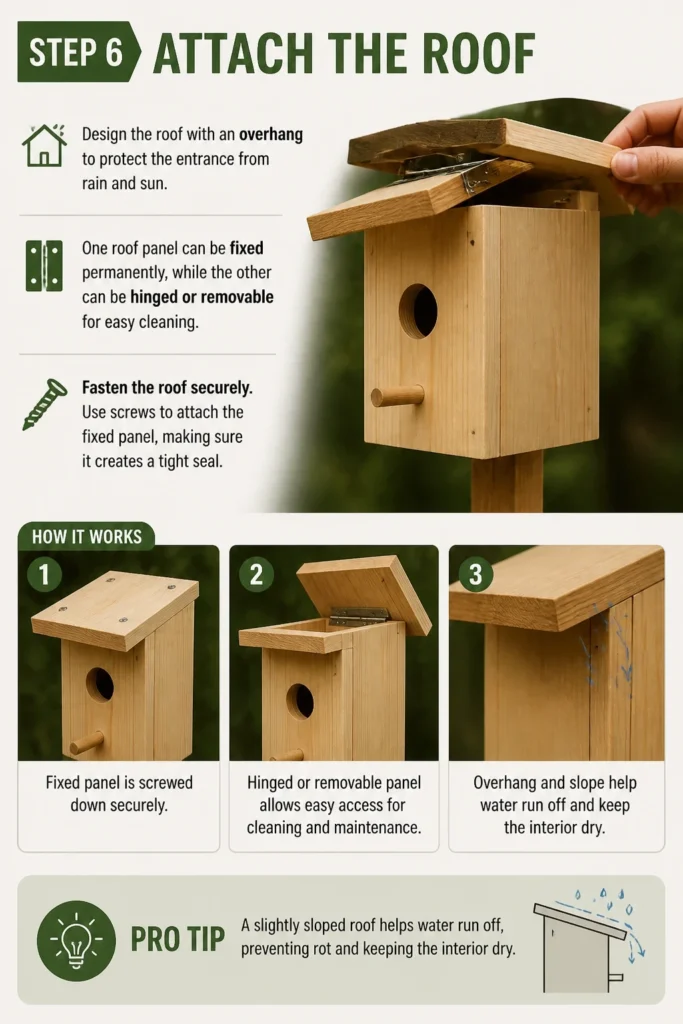
One roof panel can be fixed permanently, while the other can be hinged or removable for easy cleaning.
Fasten the roof securely. Use screws to attach the fixed panel, making sure it creates a tight seal.
Pro Tip: A slightly sloped roof helps water run off, preventing rot and keeping the interior dry.
Step 7: Add Drainage and Ventilation
Drill a few small drainage holes (1/4 inch) in the floor of the birdhouse to prevent water accumulation.
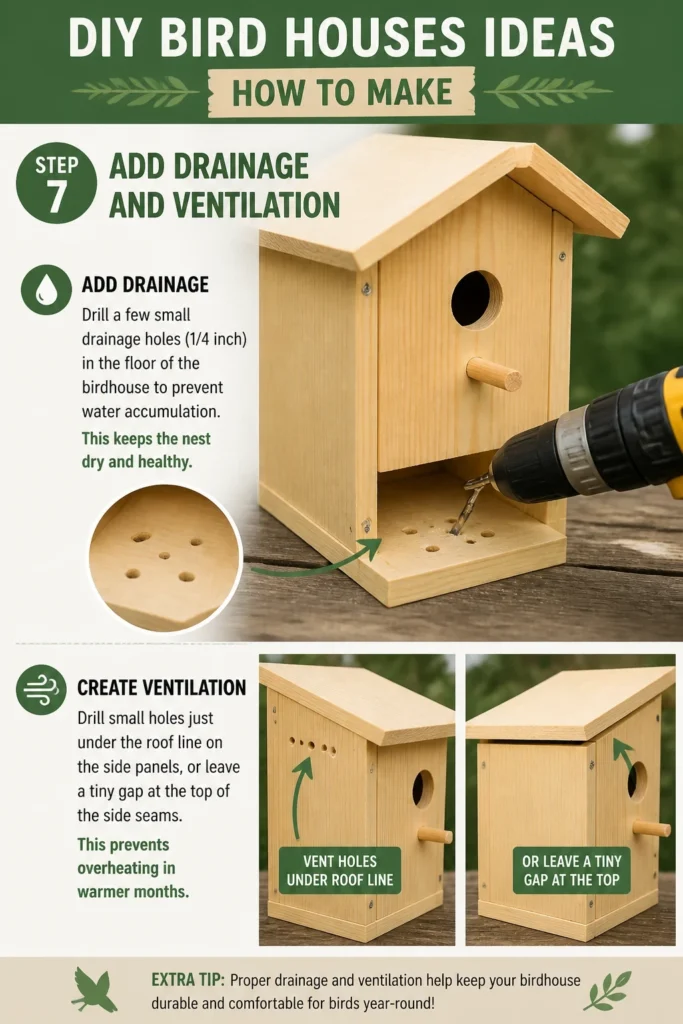
This keeps the nest dry and healthy.
Create ventilation. Drill small holes just under the roof line on the side panels, or leave a tiny gap at the top of the side seams.
This prevents overheating in warmer months.
Step 8: Smooth Edges and Prepare for Mounting
Sand all rough edges inside and out to prevent injury to birds.
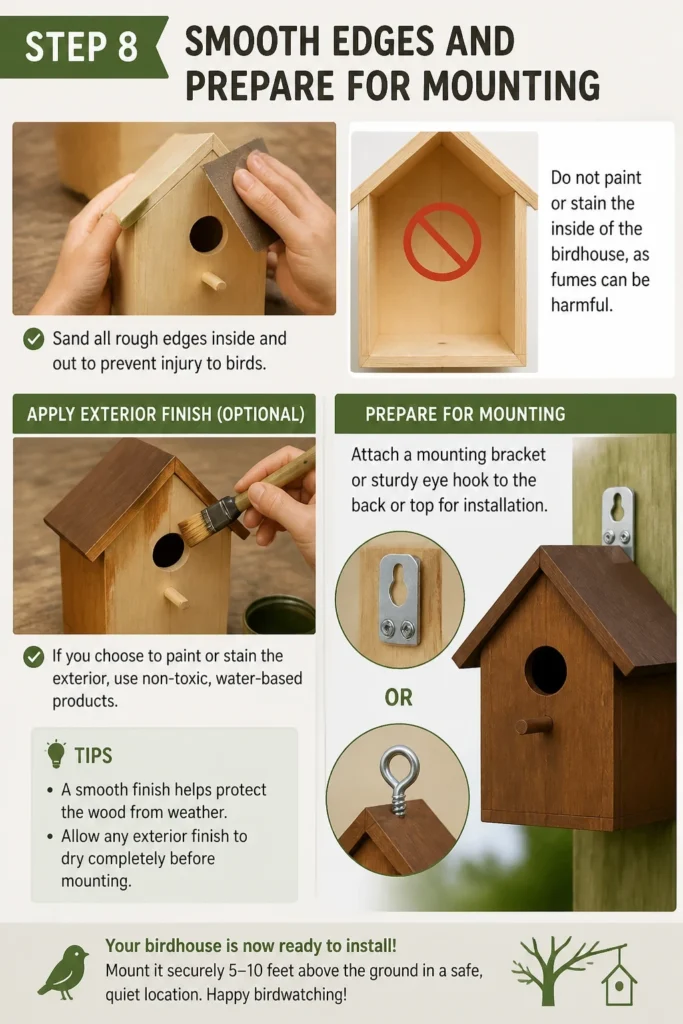
Do not paint or stain the inside of the birdhouse, as fumes can be harmful.
Apply exterior finish (optional). If you choose to paint or stain the exterior, use non-toxic, water-based products.
Attach a mounting bracket or sturdy eye hook to the back or top for installation.
Common Mistakes to Avoid
Incorrect Entrance Hole Size
A common error is making the entrance hole too large or too small for the intended bird species. An oversized hole invites predators, while a too-small hole deters the desired residents.
Always research the specific bird species’ requirements and use a precise drill bit size. A snug fit is crucial for bird safety.
Using Treated Wood or Toxic Finishes
Many DIYers mistakenly use pressure-treated lumber or conventional paints and stains. These materials contain chemicals that can be highly toxic to birds, especially in an enclosed space.
Stick to untreated natural wood. If you must add an exterior finish, choose non-toxic, water-based options and ensure they are fully dry and aired out before installation.
Lack of Drainage and Ventilation
Forgetting to add drainage holes in the floor or ventilation holes near the roof can lead to serious problems. Without drainage, rainwater will collect, making the nesting area damp and unsanitary.
Poor ventilation can cause the birdhouse to overheat, especially in direct sunlight. Always include multiple small drainage holes in the floor and a few small ventilation holes near the top.
Improper Mounting Location or Method
Placing a birdhouse in direct, prolonged sunlight or in an easily accessible spot for predators can jeopardize the birds. Mounting it insecurely can also lead to it falling.
Choose a partially shaded location, away from feeders that attract squirrels and cats. Mount the house securely to a sturdy post or tree using appropriate hardware, ensuring it’s stable against wind and animals.
Troubleshooting
Birds Are Not Using the Birdhouse
If your birdhouse remains empty, the location might be the issue. Birds are particular about their nesting sites, seeking safety and proximity to food and water.
Try relocating the birdhouse to a quieter, more secluded spot, possibly higher up or in a different orientation. Ensure it’s not facing prevailing winds or harsh afternoon sun.
Predators Are Accessing the Nest
Squirrels, raccoons, and cats can be a threat to nesting birds. If you notice signs of predation, your birdhouse might be too exposed or lack proper defenses.
Install a predator guard around the entrance hole, such as a metal plate or a wooden block with a smaller hole. Consider mounting the birdhouse on a smooth pole with a baffle to deter climbing animals.
Birdhouse Is Deteriorating Quickly
Rapid wear and tear, such as rotting wood or loose joints, usually indicates poor material choice or insufficient weather protection during construction.
Ensure you’re using naturally rot-resistant wood like cedar or redwood. Re-seal any exterior finishes annually. Tighten screws and re-caulk seams as needed to prolong its life.
Key Takeaways
- Research your target bird species to tailor the birdhouse design, especially entrance hole size.
- Always use untreated, natural wood and avoid toxic paints or stains to ensure bird safety.
- Incorporate essential features like drainage holes in the floor and ventilation near the roof for a healthy environment.
- Mount your birdhouse securely in a safe, partially shaded location away from predators.
- Regularly inspect and clean your birdhouse to maintain its condition and attract new residents.
- Patience is key; it may take time for birds to discover and occupy their new home.
Frequently Asked Questions
What is the best wood for a birdhouse?
Cedar, redwood, and untreated pine are excellent choices. They are durable, naturally weather-resistant, and non-toxic to birds. Avoid composite materials or chemically treated lumber.
Do I need to add a perch to the birdhouse?
For most cavity-nesting birds, a perch is not necessary and can sometimes even make it easier for predators to access the nest. Birds prefer to cling to the entrance hole itself.
How often should I clean my birdhouse?
It’s best to clean your birdhouse annually, typically in late fall or early winter after nesting season is over. Remove old nests and debris to make it ready for new occupants next spring.
Where is the ideal location to place a birdhouse?
Place your birdhouse in a quiet, partially shaded area, away from strong winds and direct afternoon sun. Ensure it’s mounted securely at the appropriate height for your target species, and away from potential predator access points.
Our Top Recommended Finds
- Untreated Cedar Boards: Excellent for their natural resistance to rot and insects, providing a safe, long-lasting home.
- Cordless Drill/Driver Set: Essential for pre-drilling pilot holes and securely fastening screws with ease and precision.
- Hole Saw Kit: Provides a range of precise hole sizes for entrance holes, ensuring you match the specific needs of different bird species.
Create a Welcoming Haven for Birds
Building a birdhouse is more than just a DIY project; it’s an invitation to nature, a small contribution to your local ecosystem.
You’re providing a safe space for birds to raise their young, and in return, you get the joy of observing them up close.
Don’t wait any longer. Gather your materials, follow these steps, and start building your own beautiful bird sanctuary today.